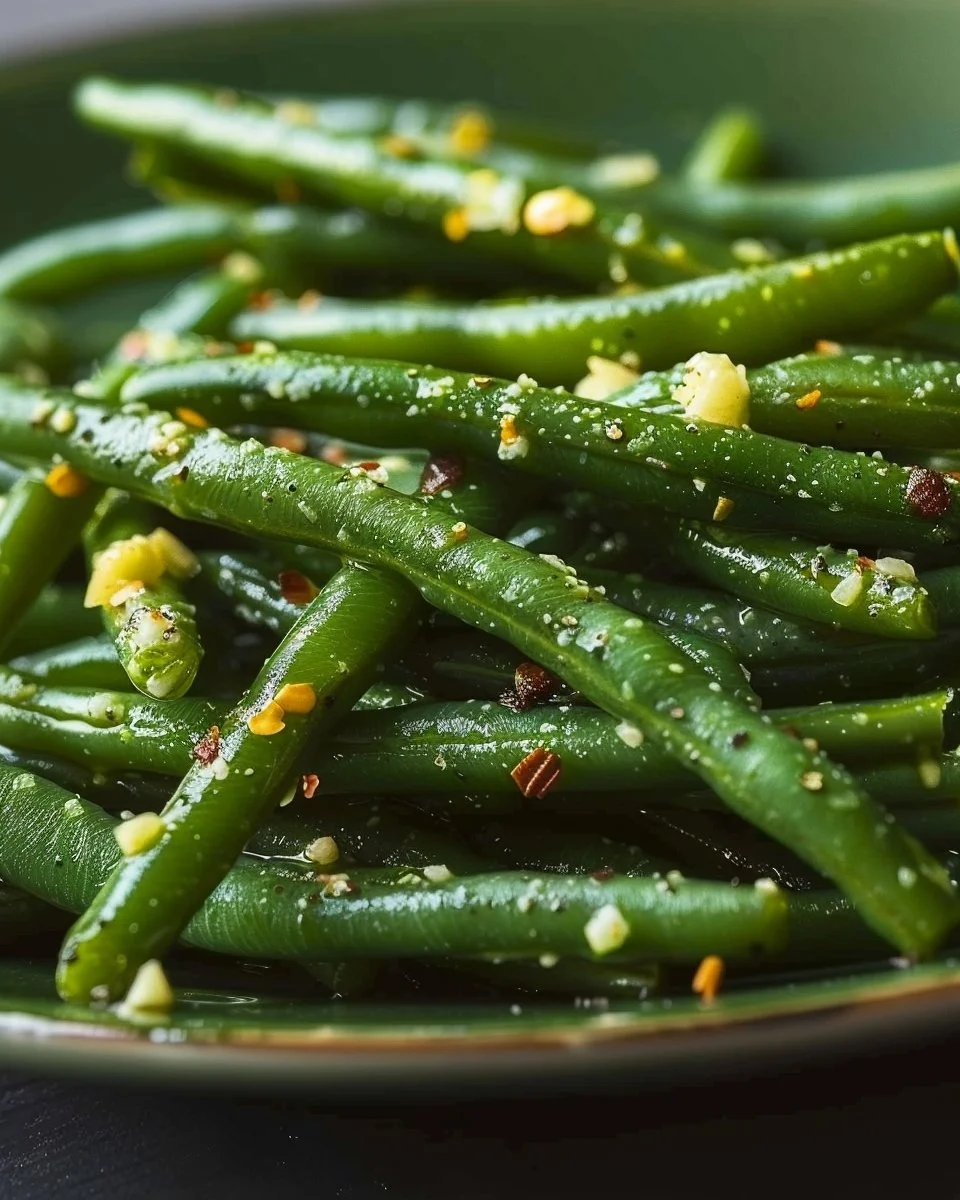
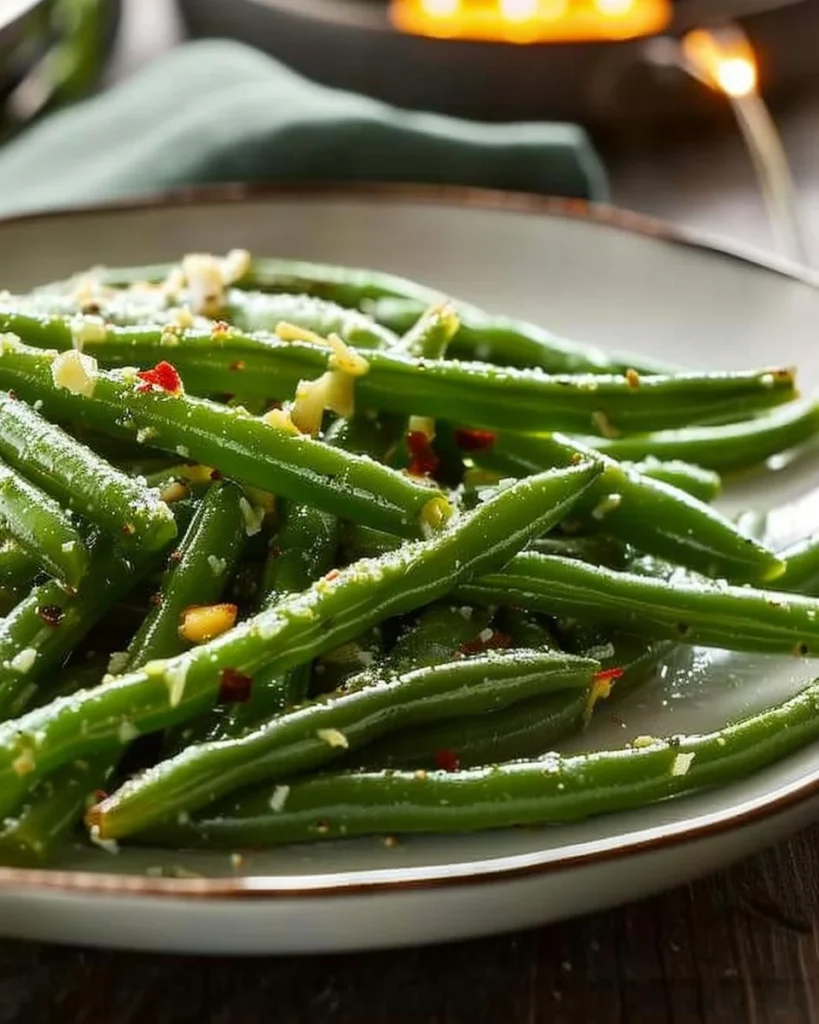
Garlic Butter Green Beans: The Side Dish That Saved My Dinner Party
The first time I tried to make Garlic Butter Green Beans, let’s just say the outcome wasn’t pretty. Picture this: a messy kitchen, a slightly burnt pot, and a whole lot of green beans staring back at me like little green soldiers gone rogue. I panicked. Not the kind of cute, fluttery panic—more like full-blown, I-need-to-lie-down panic. My best friend Jen walked in, took one look at the disaster, and said, “You know, it’s not brain surgery, right?” Good old Jen. Fourteen years of friendship and she knows just how to keep it real.
That disaster was years ago, but now, whenever I whip these beauties up, it’s a little victory dance in my kitchen. Whether I’m serving them at a fancy dinner or a casual family night, Garlic Butter Green Beans have become my go-to side dish. Trust me, you’ll want to remember this one.
Why This Matters
Here’s the thing: life gets busy, and sometimes you need a side that speaks volumes without shouting. Garlic Butter Green Beans say, “I love you.” They say, “Here’s something fancy, but I didn’t break a sweat.” They’re what I toss together when everything else feels like a question mark; when I’ve had a stressful day at work or the kids have been on a sugar high since breakfast. They tuck you in like a warm blanket, comforting and consistently delicious.
Before You Start
Before we dive into the details, let’s take a moment to make sure you’re prepped for success:
- If you only have frozen green beans instead of fresh, no worries. Just throw them in the water a little longer, and you’ll be golden.
- The one tool that makes this infinitely easier? A good pair of kitchen tongs. Trust me; you’ll want these bad boys for the sautéing dance.
- What to do if your kid starts melting down while you’re making these: bribery works wonders. Just a little tidbit from my experience.
- The exact wine to pour while whipping these up? A nice crisp white, like a Sauvignon Blanc. Or tea—whatever gets you through the evening, really.
Ingredients
- 1 lb fresh green beans (I prefer haricots verts because they’re sort of fancy, but regular ones work just fine)
- 2 tablespoons butter (I use unsalted because I’m a rebel, but feel free to use whatever you have)
- 3 cloves garlic, minced (or 5 if you want to ward off vampires—my husband claims that’s a thing)
- 1 teaspoon salt (good ol’ sea salt, because my grandma used it)
- 1/4 teaspoon black pepper (just enough to give a tiny kick)
- Optional: lemon juice (just a squeeze to brighten it up)
- Optional: red pepper flakes (my daughter says they’re “spicy,” so I just sprinkle a little on my portion)
Step-by-Step with Stories
Step 1: Prep the Green Beans
Start by trimming the ends of your green beans.
- Why this step matters: Trimming makes them easier to eat and not so stringy.
- Common mistake here: Forgetting to rinse them first. Gritty green beans? No thanks.
- My personal hack: Snap off the ends—trust me, it’s therapeutic.
I remember the first time I let my son help with this step; I had green beans flying everywhere. We both ended up in a fit of giggles, which quickly turned into a mini green bean war.
Step 2: Boil the Water
Grab a large pot and fill it with water. Bring it to a rolling boil. Add a generous pinch of salt.
- The sensory cue: You’ll know it’s ready when the water looks like it’s bubbling with excitement.
- If you’re multitasking: You can also get your garlic minced in this downtime. Just don’t chop your fingers off.
The first time I tried this, I forgot the salt. Let me just say, under-seasoned green beans feel sort of like wearing a raincoat on a sunny day—pointless and a bit sad.
Step 3: Blanch the Green Beans
Once the water’s boiling, toss in your green beans for about 3-5 minutes.
- Why this step matters: Blanching keeps them bright green and crisp.
- Common mistake: Overcooking them. They’ll turn a sad, mushy shade of green.
- My personal hack: Set a timer—trust me, I learned the hard way.
As the green beans cooked, my daughter would always peek over the pot and ask, “Are they done yet?” Bless her heart. Not when she’s still hanging around stirring up her own chaos.
Step 4: Ice Bath
Get a bowl of ice water ready. Once the beans are done, immediately transfer them to this bowl.
- Why this step matters: It stops the cooking process, keeping our lovely beans bright and crunchy.
- Common mistake: Forgetting the ice! This is a must-do.
I distinctly remember an old cooking show I once watched where a chef got way too excited about his ice bath. I used to think he was crazy until I tried it myself. Now it’s my go-to trick.
Step 5: Sauté the Garlic
In the same pot, melt the butter over medium heat. Add the minced garlic once the butter’s all melty and fragrant.
- The sensory cue: You’ll know it’s ready when your kitchen smells like heaven.
- Helpful tip: Pay attention here! Burnt garlic is the enemy.
If you ask my husband, this is the magic moment. He walks in, and immediately echoes, “What’s cooking? It smells phenomenal!”
Step 6: Add the Green Beans
Once the garlic is slightly golden, toss in your drained green beans. Sprinkle over the salt and pepper.
- Common mistake: Adding the beans too early. You want that garlic flavor on point.
- Personal hack: Give your beans a good toss. Don’t be shy.
My brother always claims he can’t do “that pan toss thing,” but I think he just likes to watch me flail around.
Step 7: Finishing Touches
Let them hang out in the pan for just a few more minutes, stirring occasionally.
- Optional: Add that squeeze of lemon and sprinkle of red pepper flakes before serving.
- What to do if they’re too salty: Add more green beans! It’s like a quick fix for any kitchen blunders.
I’ve done this more times than I’d like to admit—my husband thinks I’m trying to create a new trend. “The double garlic beans,” he calls them as I roll my eyes.
Troubleshooting Real Life
- If you burn the bottom: Add a splash of water and scrape off the burnt bits. You’re welcome.
- If you’re out of garlic: Shallots work too. Just avoid onion—too pungent for green beans, in my opinion.
- If you need to pause because of a kid emergency: Stop the cooking, cover the pan, and turn off the heat. It will be fine for a short while. Just don’t forget about it for too long!
- If it’s just not working: Just take a deep breath; it’ll be alright. Maybe take a moment to chat with a friend. Worst-case scenario, you’ve got some takeout menus handy.
The Serving Story
Serve these in a beautiful bowl—you know, the one that gets dusted off for special occasions. I like to use my grandma’s old ceramic dish because it takes me back. Plus, anything that makes food pop is worth it. The perfect side? Honestly, sometimes we just dive in straight from the pan when I’m feeling particularly chaotic.
Leftovers? Oh boy. They taste even better the next day because the flavors have that time to hang out and mingle.
When I Make This
I usually whip these up on a Thursday night because by then, I’m practically ready to leave the week behind. While they’re cooking, I’m usually folding laundry and trying to tame the chaos of our home life. And, of course, we eat them while seated at the good ol’ coffee table, binge-watching whatever’s trending on Netflix.
The cleanup? Takes about ten minutes, but it’s worth it because who doesn’t enjoy reflecting on a good meal?
The Conversational Close
Honestly, this recipe has seen me through stressful weeks, indifferent dinner guests, and countless chaotic evenings. It might not be culinary perfection, but it’s my personal ode to simple yet satisfying meals.
I’d love to hear if you try making these. Tag me in your culinary adventures or just revel in the hilarity of life. Speaking of which, what’s your go-to comfort food? I have a feeling mine will always, and forever be these Garlic Butter Green Beans.
Garlic Butter Green Beans
Ingredients
Method
- Trim the ends of your fresh green beans.
- Bring a large pot of salted water to a rolling boil.
- Blanch the green beans in boiling water for 3-5 minutes until bright green and crisp.
- Prepare a bowl of ice water and transfer the blanched green beans to it to stop the cooking process.
- In the same pot, melt the butter over medium heat and add minced garlic.
- Once the garlic is fragrant and slightly golden, add the drained green beans.
- Sprinkle with salt and pepper and toss the green beans in the garlic butter.
- Let them cook for a few more minutes, stirring occasionally.
- Just before serving, add optional lemon juice and red pepper flakes.