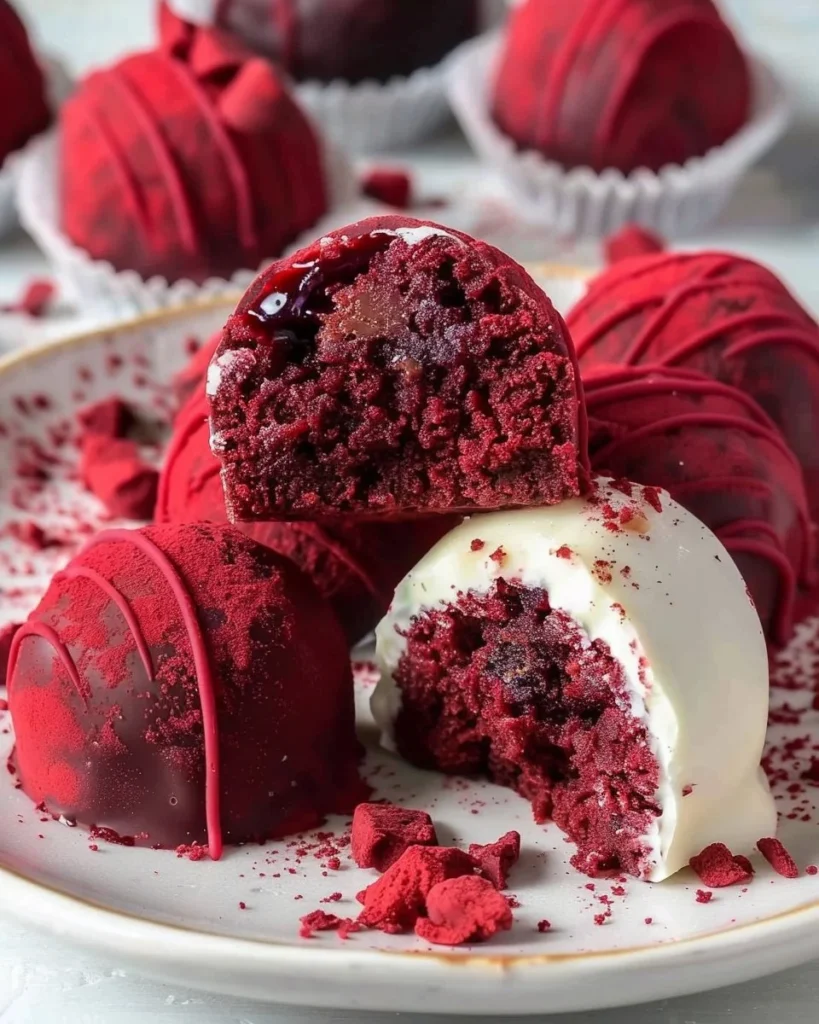
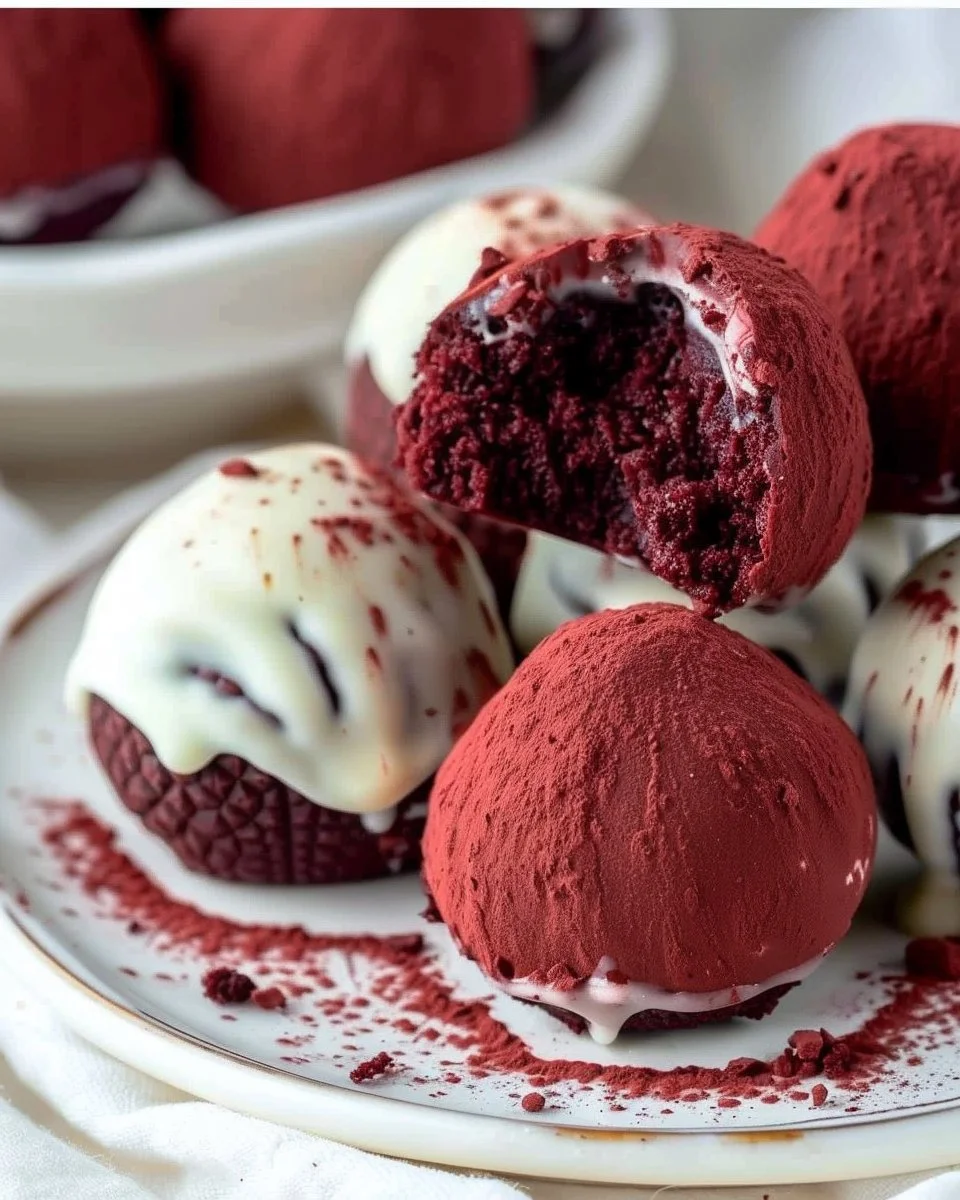
Decadent Red Velvet Truffles: A Sweet Escape
The first time I tried to make these Red Velvet Truffles, I was knee-deep in chaos. Picture this: I’m juggling two kids, the dog is barking at the mailman, and I’m pretty certain I just saw my youngest try to give the cat a bath. Amidst all this, I thought, “Why not whip up something sweet to calm my nerves?” So, I grabbed my mixing bowl and threw caution to the wind.
Long story short, there was more flour on the floor than in the bowl, and I’m pretty sure I invented a few new swear words that day. My husband, Nick, walked in to find me in tears—flour in my hair and cocoa powder on my cheek—and said, “Well, at least now we have something to eat, right?” That was around five years ago, and let me tell you, there’s nothing like a sweet treat to save the day, especially when it’s something this rich and chocolatey.
Fast forward to today, and those truffles have become my go-to for comfort, celebrations, or just because I need a chocolatey pick-me-up. Trust me on this; they can turn any frown upside down, whether you’ve had a rough week or just need something sweet to share with friends.
Why This Matters
These Red Velvet Truffles aren’t just for fancy occasions; they’re the kind of treat you make when everything feels overwhelming, yet you want to feel just a little fancy. Perfect for Valentine’s Day, an anniversary, or just a Tuesday night when you need a little indulgence without having to put on pants that aren’t sweats. They say, "I love you" without the cheesy clichés, and who doesn’t need that kind of magic in their life?
Before You Start
Okay, here are a few nuggets of wisdom before we dive in:
-
No buttermilk? No problem! You can use regular milk mixed with a splash of vinegar instead. It’s not the same, but it does the job when you’re in a pinch.
-
Don’t have a food processor? You can mix these by hand, but be prepared for a workout. Just go for it!
-
If your kids start a wrestling match on the kitchen floor: Just set the truffle mix aside, and trust me, they will calm down eventually. Maybe make some popcorn while you wait?
-
The secret ingredient? A good wine (or cocoa powder, you choose!). Pour yourself a glass because cooking is better with a little sip.
Ingredients List with Personal Notes
Now, here’s what you’ll need to whip up these beauties:
-
1 ½ cups all-purpose flour (I always use the cheap stuff; it works just as well as the fancy flour.)
-
1 cup granulated sugar (Remember, sugar is the heart of sweetness.)
-
½ cup unsweetened cocoa powder (I like to think I should be a spokesperson for Hershey’s—trust me, use the good stuff.)
-
1 teaspoon baking soda (Don’t skip this; it’s crucial for the fluffiness.)
-
½ teaspoon salt (Morton’s table salt is my go-to, because what is baking without a little contrast?)
-
1 cup buttermilk (Or milk with a splash of vinegar if you’ve forgotten to pick some up.)
-
1 teaspoon vanilla extract (Definitely buy the real deal; imitation isn’t going to cut it here.)
-
1 large egg (Free-range, because why not spoil yourself a little?)
-
½ cup unsalted butter, melted (Nothing like butter to make things richer. I use Lurpak.)
-
8 oz cream cheese, softened (Trust me, don’t skimp on quality here—Philadelphia brand is what I use.)
-
2 cups powdered sugar (I eat the leftover straight from the bowl when no one’s watching; is that just me?)
-
Red velvet cake crumbs (from a one-layer cake) (You can bake your own or grab a slice from your local bakery. No shame here!)
-
White chocolate or chocolate for coating (I prefer Ghirardelli, because the flavour is just unbeatable.)
Step-by-Step with Stories
1. Preheat the Oven
First things first, preheat your oven to 350°F (175°C). You wanna get that heat going because nobody likes waiting around forever for the oven to catch up.
Why this step matters: It ensures even baking so your truffles come out perfectly.
Anecdote: The first time I forgot to preheat, I put my cake in right away and ended up with something akin to a pancake. It was a nightmare, so learn from my mistakes!
2. Mix the Dry Ingredients
In a mixing bowl, combine your flour, sugar, cocoa powder, baking soda, and salt. Give it a good whisk to blend them together.
Common mistake: If you don’t mix it well initially, you’ll end up with bitter spots of cocoa in your batter, and nobody wants that heartbreak.
Personal hack: I like to sift the cocoa powder to make it nice and fluffy—less clumping, more love.
3. Combine the Wet Ingredients
In another bowl, mix your buttermilk, egg, melted butter, and vanilla until well combined. I’m telling you, the smell of vanilla suffuses the room like a warm hug. It’s one of the best parts of the whole thing.
4. Incorporate the Wet and Dry Mixtures
Slowly add the wet ingredients into the dry ingredients, stirring until just combined.
Sensory cue: You’ll know it’s ready when it looks smooth and has a luscious, rich colour that screams "I’m going to be delicious."
Little secret: I used to over-mix this part and ended up with dry truffles, and that’s just sad, isn’t it?
5. Bake the Cake
Pour the batter into a greased 9-inch round cake pan and bake for about 25-30 minutes.
Why this step matters: A well-baked cake is vital for the perfect truffle. Don’t rush this!
Common mistake: Overbaking leads to dry cake. So, poke it with a toothpick; it should come out clean but not hard.
Anecdote: My son once begged me to let him use the toothpick as a helicopter. I couldn’t say no—he’s a creative soul, after all.
6. Cool and Crumble
Once baked, cool the cake for about 10 minutes before transferring it to a wire rack to cool completely. Once cool, crumble the cake into a large bowl.
The emotional part: Crumbling the cake feels a little like therapy, doesn’t it? It’s oddly satisfying.
7. Mix with Cream Cheese Frosting
In the same bowl, mix in your softened cream cheese and powdered sugar until fully combined. You want it to be dough-like and super rich.
If it’s too dry: Add a splash of milk to soften it up.
8. Roll into Balls
Using your hands, roll the mixture into bite-sized balls and place them onto a parchment-lined baking sheet.
Full disclosure: This was my kids’ favourite part. They loved getting their hands messy, so I usually set up an assembly line to keep them occupied (and away from fighting).
9. Chill Out
Chill those balls in the fridge for at least 30 minutes. It helps them firm up before coating.
You’ll know when they’re ready because they’ll feel sturdy and firm but still soft enough in the middle.
10. Coat with Chocolate
Melt your white or dark chocolate in a microwave-safe bowl (15-second intervals, please!). Dip each truffle in chocolate and place it back on the parchment paper.
Anecdote: The first time I dipped them, I ended up with more chocolate on my fingers than on the truffles. It was a mess, and my husband still teases me about it!
11. Final Chill
Chill the coated truffles again until the chocolate hardens.
The secret nobody tells you: I keep some chocolate aside for drizzling. It makes the presentation way cuter.
Troubleshooting Real Life
-
If the truffle mixture is too sticky: Dust your hands with powdered sugar. Just a light sprinkle does wonders.
-
If you burn the chocolate while melting: Mix in a wee bit of oil to save it.
-
Need to pause because the kids are going nuts? Just refrigerate the mixture until you’re ready to roll again. It holds up nicely.
-
If they just aren’t turning out: It’s okay to admit defeat. Order a takeaway from your fancy local place without guilt; everyone deserves a night off.
The Serving Story
I serve these truffles in a cute little mason jar because apparently I’m one of those people who believes that food tastes better in a jar. Also, it’s an easy way to present them as a gift; who doesn’t love a little homemade sweetness?
The perfect side? Honestly, it’s just good coffee or a nice glass of wine while you indulge. Leftovers (if there are any) get better with time, so don’t be shy about making a batch, even if you think it’s too much.
When I Make This
I usually whip these up on weekends when the house is quiet (which is rare). While they chill, I might catch up on a bit of Netflix or sip my coffee slowly, because let’s be real, it’s money well spent on that sweet, quiet time.
We typically end up eating them on the couch while watching a movie. Or, if I’m feeling particularly fancy, I’ll get everyone together at the table, light a candle, and pretend I’m a real chef.
Cleanup takes about 20 minutes, especially with the kiddos helping (which means more eating than cleaning, to be honest), but it’s totally worth it to see everyone’s faces light up when they take their first bite.
The Conversational Close
These Red Velvet Truffles have been with me through countless birthday parties, late-night Netflix binges, and random kitchen disasters. They might not be perfect, but they hold a special place in my heart (and my recipe book).
I’d love to hear if you give them a go—tag me or just enjoy them quietly on your own with a cup of something lovely. What’s your go-to comfort food? Mine changes every season, but it looks like this one is sticking around for a while.
And hey, if you mess up a bit, remember: it’s the effort that counts. Happy cooking, friends!


Red Velvet Truffles
Ingredients
Method
- Preheat your oven to 350°F (175°C).
- In a mixing bowl, combine flour, sugar, cocoa powder, baking soda, and salt. Whisk to blend.
- In another bowl, mix buttermilk, egg, melted butter, and vanilla until well combined.
- Slowly add wet into dry ingredients, stirring until just combined.
- Pour batter into a greased 9-inch round cake pan and bake for about 25-30 minutes.
- Once baked, cool the cake for about 10 minutes, then crumble it into a large bowl.
- Mix in softened cream cheese and powdered sugar until fully combined.
- Roll the mixture into bite-sized balls and place them onto a parchment-lined baking sheet.
- Chill the balls in the fridge for at least 30 minutes.
- Melt your chocolate in a microwave-safe bowl. Dip each truffle in chocolate and place it back on parchment paper.
- Chill the coated truffles until the chocolate hardens.