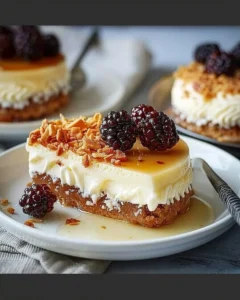
The Sweet Surprise: Homemade Cheesecake Bread Recipe
The first time I tried to make this cheesecake bread, I was in my kitchen, looking around as if the walls were judging me. You see, I had promised my neighbor Susan I’d whip up something special for her daughter’s birthday party—something fun but also a little unexpected. I thought, "How about cheesecake bread?" Sounds delightful, right? Well, picture this: flour everywhere, a stream of cream cheese that looked suspiciously like it had a grudge against me, and me, standing there, somewhere between laughter and tears. My husband walked in, took one look at the chaos, and said, "Maybe stick to pizza next time?" That was ages ago, but you know what? Now, every time I make this recipe, it feels like a little party in the kitchen (minus the flour storm) and a sweet escape from the week’s chaos.
Why This Recipe Matters
Okay, here’s the thing—this isn’t just about making bread. This cheesecake bread is the kind of treat that says, "I care about you" without even needing to bake a cake. It’s my go-to for those evenings when I need a little sugar fix or when Susan shows up for an impromptu cup of tea (which, let’s be real, is often). You know that moment when you’ve had one of those chaotic days? This is where cheesecake bread shines. It’s comforting, indulgent, and just fancy enough to impress anyone who takes a bite.
Before You Start
Before you dive into this adventure, I have a few pointers that will make your baking life a whole lot easier:
-
You don’t need fancy flour: If you’ve only got all-purpose flour, trust me, that works just as well. Don’t go hunting for anything special unless you’re feeling particularly adventurous (or have it lying around).
-
Make room for a mess: You might think you’ve got everything under control, but let’s be realistic—there’s always a moment when you get flour in your hair. Embrace it!
-
Time for a Netflix break: This isn’t a race. If you need to pause to handle laundry or rescue a cat stuck in a tree (because why not), just wrap the dough in cling film and stick it in the fridge for a bit. It’ll wait for you.
-
The wine situation: I find that a cheeky glass of Chardonnay pairs wonderfully with the process. Makes you feel a bit like a French chef, even if you’re just in your pajamas.
Ingredients
This is where the fun begins, so let’s talk about what you’ll need to create this delight:
-
2 cups all-purpose flour (I use plain old Tesco’s value flour since I’m trying to save my pennies but any kind will do)
-
1 cup sugar (a bit indulgent, but we’re not counting calories here, are we?)
-
½ cup unsalted butter, softened (because you’re not a monster, right?)
-
1 cup cream cheese, softened (the star of the show—let it sit out for a bit, that way it’s easier to mix)
-
2 large eggs (free-range, if you can find them; they make you feel like a proper farmer)
-
1 tsp vanilla extract (the good stuff, trust me—you’ll taste the difference)
-
1 tsp baking powder (make sure this isn’t expired or you’ll end up with a brick)
-
¼ tsp salt (to balance out the sweetness; we don’t want kids bouncing off the walls)
-
Optional: chocolate chips or berries (because sometimes I just want to live on the wild side)
The Step-by-Step with Stories
Step 1: Gather Your Ingredients
Gather all ingredients on your counter.
Why this matters: You want everything to be in front of you. Less hunting, more baking.
Common mistake here: Forgetting something crucial, like the sugar. I knew a friend who didn’t add sugar and served a “healthy” version—cough!
My personal hack: Measure everything in advance and put them in little bowls. It makes you look like a pro. Plus, it’s easier to clean up when something gets knocked over.
Step 2: Preheat Your Oven
Preheat your oven to 350°F (175°C).
The secret nobody tells you: Preheating helps your bread rise beautifully. Nobody wants an unhappy loaf, trust me.
You’ll know it’s ready when you hear that satisfying “beep.” Or if your cat jumps off the counter because it’s no longer warm.
Step 3: Mix the Butter and Sugar
In a large bowl, mix the softened butter and sugar together until it’s light and fluffy.
Common mistake here: Not using room temperature butter. If your butter’s too cold, you’re going to get a workout. Seriously, save your arm!
Learn from my mistakes: The first time I did this, I thought I could skip the fluffiness step. The bread didn’t rise much, and I ended up with a dense something (not quite bread, not quite a rock).
Step 4: Add the Cream Cheese
Now, throw in that cream cheese and beat until it’s combined.
This is where the magic happens! You know it’s ready when it all looks like a creamy cloud.
A tiny story: This is usually when my dog Benny comes trotting in because he knows I’m about to spill some mixture. Spoiler: I do, and he’s quick on the uptake.
Step 5: Incorporate the Eggs and Vanilla
Add your eggs one at a time, mixing thoroughly after each addition along with the vanilla extract.
Okay, let’s be real—mixing well is key here. If you see some random chunks of cream cheese floating around, you might as well drop it in the trash now.
Full disclosure: I’ve haphazardly dropped eggs in the bowl and then panicked because I thought one was bad. Nothing like a moment of horror in the kitchen!
Step 6: Combine Dry Ingredients
In another bowl, whisk together the flour, baking powder, and salt.
Why this matters: Mixing the dry stuff separately means you avoid those annoying lumps of baking powder in your bread. No one wants that surprise!
If you’re multi-tasking: This is a great time to pour a glass of whatever you’ve decided to sip. Enjoy while it’s peaceful.
Step 7: Gradually Fold in the Dry Ingredients
Now, carefully fold in the dry ingredients until just combined.
Common mistake here: Overmixing! If you go too big, you’re going to get lead not bread. Just gently fold it in—think of it as a hug, not a workout.
My grandma: She used to say, "A gentle touch makes the most fluffy bread,” and well, I think she was right.
Step 8: Add Extra Flavours
If you’re tossing in chocolate chips or berries, now’s the time to do it.
Honestly, I just want to eat straight chocolate chips while I’m at it, but I’ll resist.
Step 9: Pour into Prepared Pan
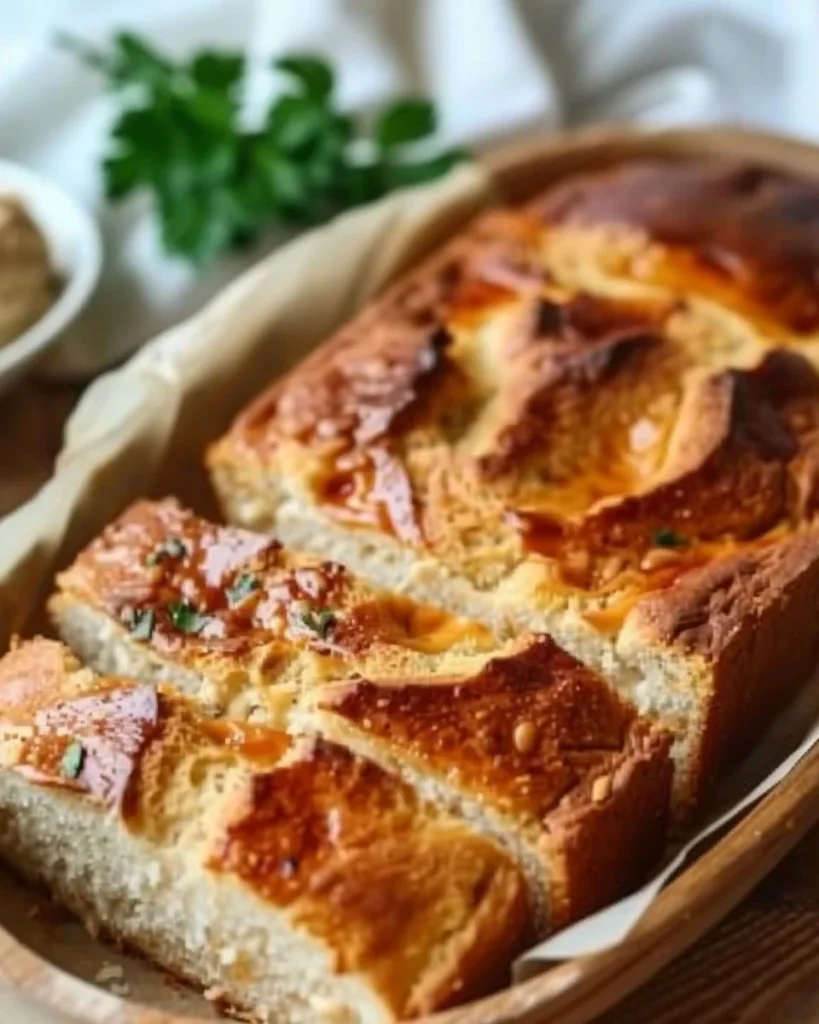
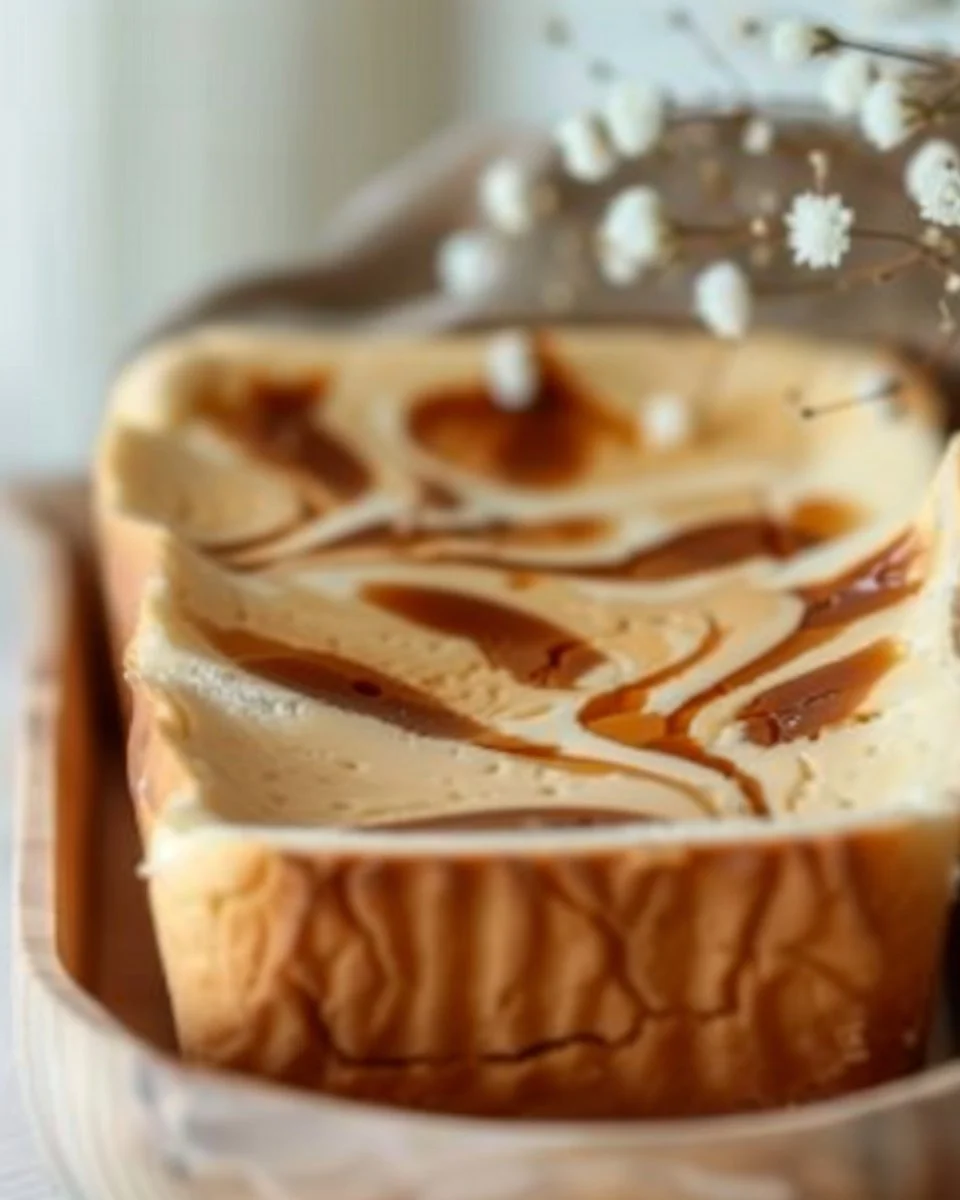
Pour the batter into a greased loaf pan.
How to make this fun? Use a spatula to scrape down the sides while pretending it’s a cooking show. Picture Gordon Ramsay talking you through it. (I don’t always win that battle—some batter inevitably ends up on the floor.)
Step 10: Bake Away!
Slide that pan into the oven and set your timer for 50-60 minutes.
The sensory cue: You’ll know it’s done when the top is lightly golden and a toothpick inserted in the middle comes out clean.
Funny aside: I’ve had my share of clumsy moments—like the time I elbowed the oven door while trying to peek. You would’ve thought I was auditioning for a slapstick comedy!
Troubleshooting Real Life
-
If you burn the bottom: Don’t panic. Cut off the burnt bits (there’s no shame in that), and serve it with some butter smeared on top. Just pretend it’s a French-style thing.
-
If you run out of eggs: Unsweetened applesauce can be a solid alternative—about ¼ cup substitutes one egg, and who knew it would work well?
-
If it’s just not working: Embrace takeout. Order a pizza and tell your family it’s “pizza night.” Nobody will complain.
The Serving Story
Picture this: I usually slice the cheesecake bread and serve it on my old, chipped wooden board—because it adds “rustic charm” (read: I’m too lazy to buy a new one).
Sometimes I sprinkle a bit of icing sugar on top because it makes everything look fancy. If you have whipped cream lying around, that’s excellent too.
Leftovers? They taste even better the next day. Seriously, the flavours just mingle beautifully in the fridge as if they’re setting up a little surprise party for you.
When I Make This
I usually make this on a rainy Saturday afternoon because it’s cozy, and well, the rain gives me an excuse to stay in my pajamas. While the bread bakes, I might fold a load of laundry or catch up on that Netflix show I’m trying to finish without spoilers lurking over my shoulder.
We usually eat it at the coffee table while debating if we should tackle board games or watch another episode. The cleanup? It only takes 10 minutes if I don’t get distracted by kids’ bickering over whose turn it is to pick the next movie. But trust me, every crumb on that table is worth it.
The Conversational Close
This cheesecake bread has seen me through birthdays, rainy days, and even the occasional kitchen disaster. It’s not perfect, but it’s mine, just like that chipped wooden board. I’d love to hear if you make it—tag me on social media or just enjoy it in peace.
What’s your go-to comfort food? Mine changes, but for now, it’s this delightful little loaf that’s sweet enough to lift my spirits. Now, let’s get to baking!
And there you have it, my friend—cheesecake bread that can save the day, one slice at a time. Happy baking!

Cheesecake Bread
Ingredients
Method
- Gather all ingredients on your counter.
- Preheat your oven to 350°F (175°C).
- In a large bowl, mix the softened butter and sugar until light and fluffy.
- Add the cream cheese and beat until combined.
- Incorporate the eggs one at a time, mixing thoroughly after each addition along with the vanilla extract.
- In another bowl, whisk together the flour, baking powder, and salt.
- Gradually fold in the dry ingredients until just combined.
- If using, fold in the chocolate chips or berries.
- Pour the batter into a greased loaf pan.
- Bake in the preheated oven for 50-60 minutes, or until the top is lightly golden and a toothpick inserted in the middle comes out clean.
- Slice the cheesecake bread and serve it on a rustic board, optionally sprinkling icing sugar or serving with whipped cream.