Crumbl Copycat Red Velvet Cookies: From Kitchen Fails to Family Favourites
Let me take you back to a cold February afternoon when my kitchen looked less like a baking haven and more like a warzone. I was trying to whip up a batch of red velvet cookies that I’d seen on Instagram from that trendy place, Crumbl Cookie. Now, full disclosure, I’d never baked anything this ambitious in my life. The first time I tried to make these, I cried. Not elegant, single-tear crying, but full-on, why-is-there-flour-in-my-hair sobbing. My daughter, Lucy, walked in, took one look at the disaster, and said, “Mum, I think you might need some practice.”
That was well over three years ago, and now those rather chaotic beginnings have turned into a beloved family ritual. Whenever I tackle these cookies, it feels like I’m embracing not just a dessert but a memory, an inheritance from that moment of failure that heralded my newfound passion for baking. So, if you’re ready to avoid my early pitfalls and dive into these delicious Crumbl Copycat Red Velvet Cookies, let me save you from that first awful attempt. Trust me on this.
Why This Matters
Okay, let’s be real. Baking can feel like an uphill battle, can’t it? Especially when you’re juggling kids, work, and the occasional Netflix binge session. But here’s the thing: These red velvet cookies aren’t just another sugary treat. They are what to bake when you need to make someone feel special or to elevate your midweek dessert to something out of a bakery window. They’re perfect for Valentine’s Day (which, funnily enough, is when I first attempted them), or, honestly, any day where you fancy a bit of comfort in the form of a sweet, soft cookie.
And let’s not ignore the potential for nostalgia! Each bite has a story, whether it’s the vibrant red colour reminding you of school bake sales or the cream cheese frosting evoking memories of quirky family dinners.
Before You Start
A Few Pointers Before Getting in the Mix
-
If you only have regular cocoa powder instead of Dutch-processed, here’s what happens: your cookies will taste great but might not have that deep, rich flavour. Just a heads up!
-
The one tool that makes this infinitely easier is a stand mixer. If you don’t have one, don’t panic—your good old hand mixer will do.
-
What to do if your toddler starts melting down at step 3 (speaking from experience): throw on their favourite TV show for 15 minutes—baking is about flexibility!
-
The exact wine to pour while cooking this (or tea, if it’s that kind of day): I’d recommend a nice red like Merlot to sip while you bake. You know, for courage and creativity!
Ingredients You’ll Need
- 2 ½ cups all-purpose flour (I always keep a stash of plain flour from Tesco, as it’s just easier on the wallet)
- 1 cup sugar (granulated works just fine here; I’m not fancy)
- ½ cup brown sugar (gotta love that extra flavour)
- ½ cup unsalted butter, softened (it’s usually a race for me to get it out beforehand, but if you’re in a pinch, pop it in the microwave for 10 seconds)
- 1 large egg (room temperature is preferable, but I’m not gonna lie, I’ve used straight from the fridge before and they were still tasty)
- 1 tablespoon vanilla extract (the more natural, the better—I’m partial to Nielsen-Massey)
- 1 tablespoon red food colouring (don’t skip this; it makes all the difference for that vibrant hue)
- 2 tablespoons cocoa powder (I use Cadbury’s because I love that nostalgic taste!)
- 1 teaspoon baking soda (fresh is key—no one wants flat cookies, okay?)
- ½ teaspoon salt (I use sea salt; my grandma swore by it)
- ½ cup cream cheese, softened (optional but let’s be honest, is there any cookie that isn’t better with cream cheese frosting?)
- Optional: chocolate chips or nuts (my kids are chocoholics, so I can’t resist adding them)
Step-by-Step Instructions
Step 1: Prepping the Oven
Preheat your oven to 350°F (175°C), and let’s get this party started!
Why this step matters: Preheating ensures your cookies get that lovely even bake, so they’re soft and chewy in the middle.
Common mistake here: Forgetting to preheat can turn your cookies into a gooey mess—don’t do what I did and try to rush it!
My personal hack: While the oven heats, I like to make sure my ingredients are out and ready—it saves time when you feel that cookie craving coming on.
Step 2: Cream Your Butter and Sugars
In a large mixing bowl, beat the softened butter, granulated sugar, and brown sugar together until light and fluffy, about 2-3 minutes.
The sensory cue: You’ll know it’s ready when it looks fluffy and pale—literally, you should see some volume increase here!
If you’re multi-tasking: This is a great time to brew that tea or pour that wine!
Anecdote: You might find your kids popping their heads in at this point, eager to help out. My son, Sam, always loves to sneak a taste of the cookie dough. Might I remind you that tasting dough is a great motivator to encourage little helpers.
Step 3: Adding in the Good Stuff
Beat in the egg, vanilla extract, and red food colouring until well blended.
Why this step matters: The egg binds everything together, while the vanilla and food colour give it that beautiful flavour and hue.
My personal hack: If you don’t have food colouring, you can make a natural version using beet juice! It won’t be as vibrant, but it’s something to consider.
Anecdote: The first time I added too much food colouring, it looked like I’d created a horror movie set—let’s just say, my kitchen looked like a crime scene for cookies.
Step 4: Dry Ingredients Unite
In a separate bowl, whisk together the flour, cocoa powder, baking soda, and salt. Gradually mix this into the wet ingredients until just combined.
Common mistake here: Overmixing can lead to tough cookies. Learn from my mistakes!
If you’re out of cocoa powder: Just elevate the sugar to keep the sweetness on point, but consider an alternative like ground carob if you’re feeling adventurous.
Step 5: Scoop and Roll!
Using a cookie scoop (or your trusty hands), drop spoonfuls of dough onto baking sheets lined with parchment paper, spacing them about 2 inches apart.
Why this step matters: Spacing is key for giving your cookies room to spread without merging into one giant one!
Step 6: Into the Oven They Go
Slide your tray into the oven and bake for about 10-12 minutes or until the edges are set but the centres are still soft.
The sensory cue: You’ll know they’re ready when the smell of chocolate wafts through your house and you can see a slight sheen on top.
Step 7: The Waiting Game
Let the cookies cool on the baking sheet for 5 minutes before transferring them to wire racks to cool completely.
If you need to pause because of an unexpected distraction: Just leave the cookies on the tray—they’ll continue to cook slightly from the residual heat. Trust me, this has saved me more than once during my madhouse days!
Step 8: Frosting Magic
If you’re adding cream cheese frosting, whip that up now! Just beat together cream cheese, a bit of vanilla, icing sugar, and a splash of milk until it’s light and fluffy.
Troubleshooting real life: If your frosting ends up too thick, just add a splash of milk until you reach your desired consistency.
Step 9: Decorate and Serve
Spread the frosting onto each cooled cookie or pipe it if you’re feeling fancy!
I serve these in a big, festive bowl because they just look so inviting set out on the table.
Step 10: When I Make This
I usually whip these up on lazy weekends when I want to indulge a bit without setting off the smoke alarms. While they bake, I might kick back with a good book or get the kids involved in some weekend craft.
We usually gather around the coffee table and demolish them while watching one of our favourite family movies—nothing like a little family bonding over sweet, soft cookies!
The Conversational Close
This recipe for Crumbl Copycat Red Velvet Cookies has seen me through celebrations, low days, and everything in between. It might not be perfect, and my kitchen might still see its fair share of chaos, but it’s mine.
I’d love to hear if you make them—tag me on social or just enjoy it quietly. What’s your go-to comfort food? Right now, it’s definitely this, but I can see my cravings changing with every season. Happy baking!
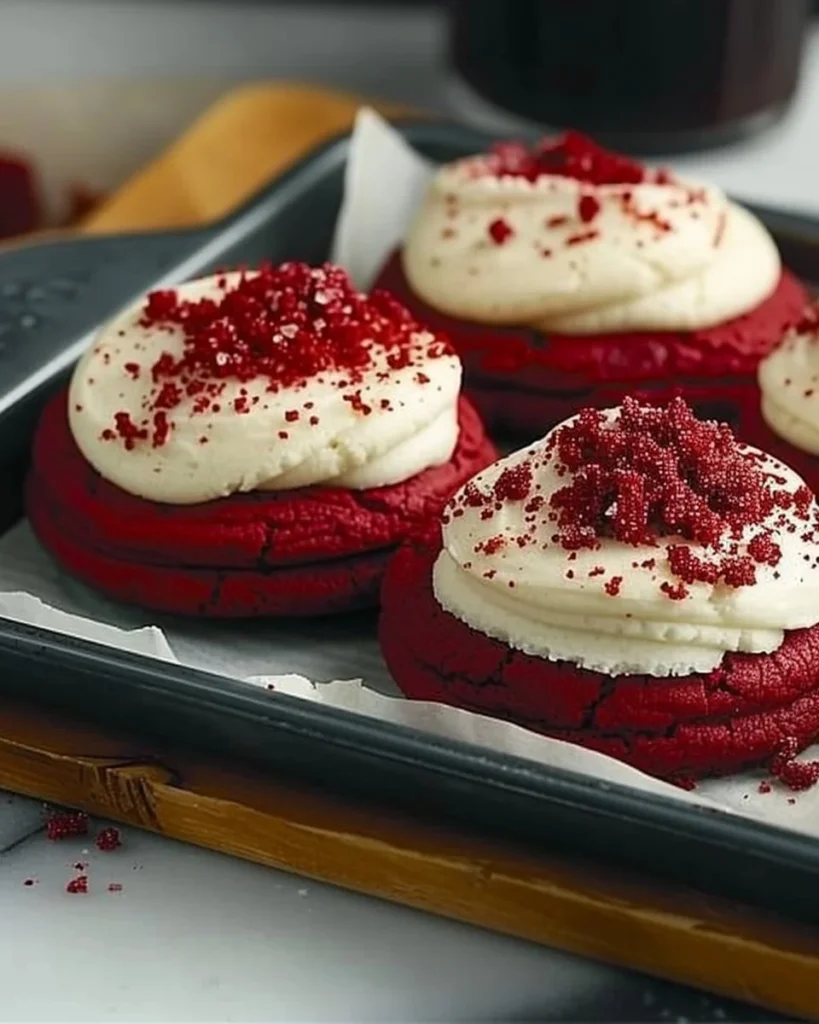
Crumbl Copycat Red Velvet Cookies
Ingredients
Method
- Preheat your oven to 350°F (175°C).
- In a large mixing bowl, beat the softened butter, granulated sugar, and brown sugar together until light and fluffy, about 2-3 minutes.
- Beat in the egg, vanilla extract, and red food colouring until well blended.
- In a separate bowl, whisk together the flour, cocoa powder, baking soda, and salt. Gradually mix this into the wet ingredients until just combined.
- Using a cookie scoop, drop spoonfuls of dough onto baking sheets lined with parchment paper, spacing them about 2 inches apart.
- Slide your tray into the oven and bake for about 10-12 minutes or until the edges are set but the centres are still soft.
- Let the cookies cool on the baking sheet for 5 minutes before transferring them to wire racks to cool completely.
- If using, whip together the cream cheese, vanilla, icing sugar, and a splash of milk until light and fluffy.
- Spread or pipe frosting onto each cooled cookie.