Birthday Cake Scones: The Sweet Treat That Brings Joy to Every Celebration
Okay, let’s be real. The first time I tried to bake scones, let’s just say, I had an Elvis-worthy blooper on my hands. I ended up with a lump of dough that resembled a cement block more than anything edible. My friend Sarah walked in right then, took one look at my flour-covered face, and simply said, "Well, at least we know you’ll never be a professional scone-maker." Except, she said it with a twinkle in her eye, and we burst into laughter. Fast forward a few years (yes, I’ve learned some things since then), and here we are. I’ve discovered the magic of birthday cake scones. These little wonders are what I whip up whenever I want to celebrate—not just birthdays, but those everyday wins too.
So, whether you’re toasting to another trip around the sun or just aiming to sweeten a dreary Tuesday, let me save you from those early attempts at baking disasters. Trust me on this!
Why This Matters
These birthday cake scones aren’t just about filling your tummy; they’re a whole mood. It’s the kind of recipe that says, "I see you, I celebrate you." It’s for when your friend aced a job interview, or when your kid brings home an amazing report card. And honestly? It’s what to make when you’re too exhausted from life to think, but you still want to brighten someone’s day. Plus, let’s face it—everyone loves a bit of cake, but it feels so much more casual when it’s in scone form, doesn’t it?
Before You Start
- If you’re fresh out of sprinkles, don’t fret. You can toss in chocolate chips or even dried fruits—go wild!
- The one tool that makes this infinitely easier is a simple cookie scoop. Trust me, it cuts down on mess, and your portions will be delightfully uniform.
- If your toddler starts melting down mid-mixing (speaking from experience here), put them at the table with some flour and let them "help." It buys you an extra five minutes of peace.
- The exact drink to pour while whipping these up? A cuppa—because this is a British classic, after all. Or maybe a cheeky glass of fizz if you’re feeling festive.
Ingredients List
- 2 cups all-purpose flour (I use plain old Tesco value flour because, hello, budgets!)
- 1/4 cup granulated sugar (sugar=happy vibes)
- 1 tbsp baking powder (the stuff that’ll make these fluff up like a cloud)
- 1/4 tsp salt (just enough to balance everything out)
- 1/2 cup cold butter, cubed (don’t forget to sneak a few tablespoons when no one is looking)
- 1/2 cup whole milk (but I won’t judge if you grab the semi-skimmed)
- 1 tsp vanilla extract (use the good stuff, it makes a world of difference)
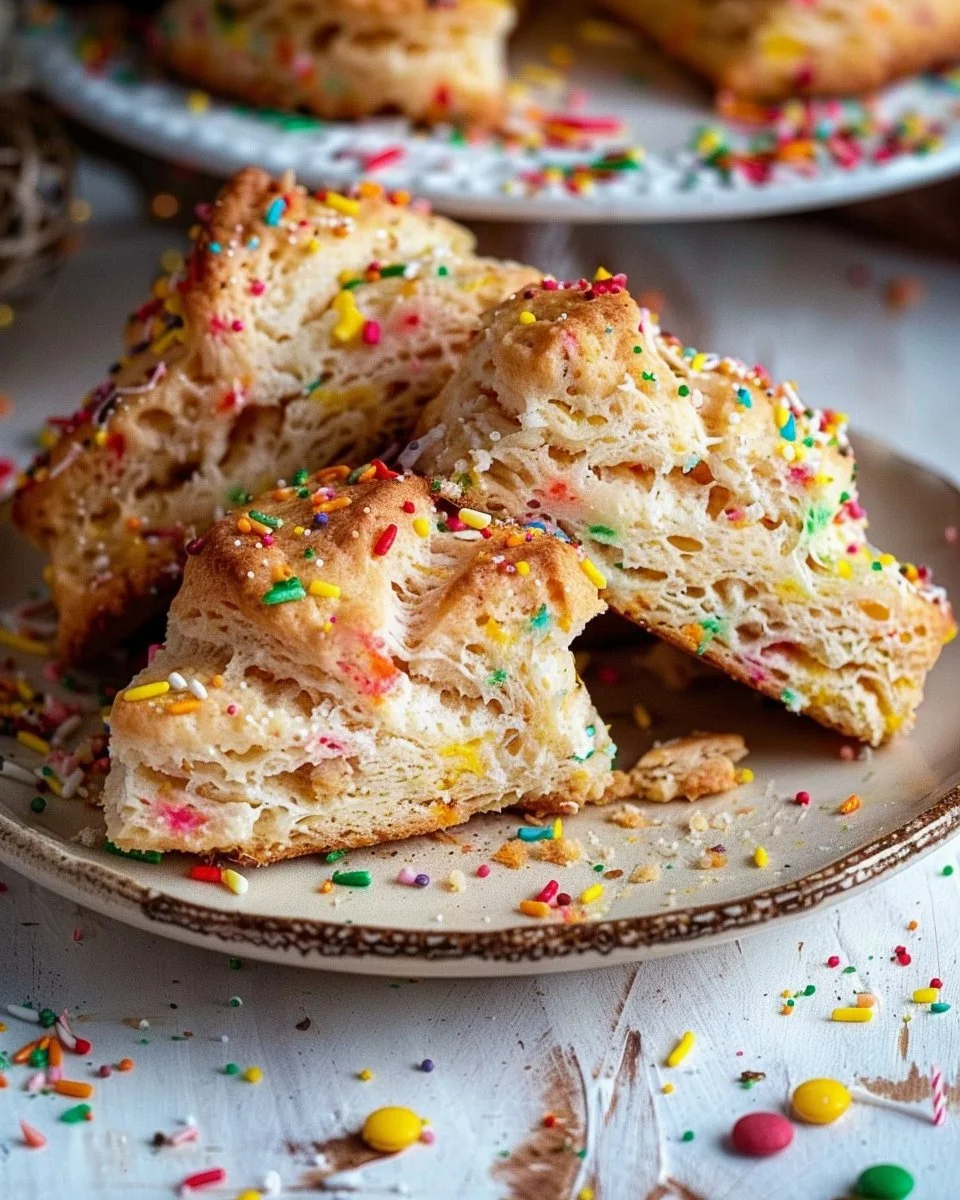
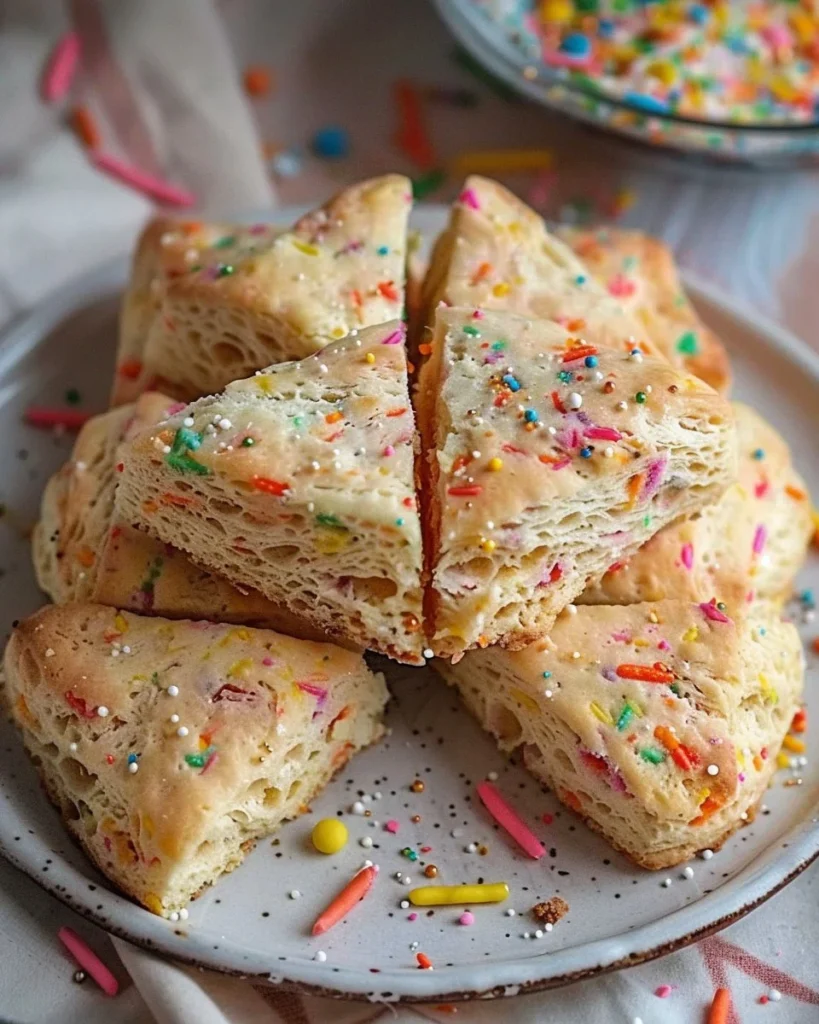
- 1/2 cup birthday sprinkles (the best part, really—go overboard)
- Optional: icing for drizzling (because everything is better with icing, isn’t it?)
Step-by-Step Instructions
Step 1: Preheat the Oven
Heat your oven to 400°F (200°C).
Why this step matters: A hot oven is crucial for that beautiful rise—sort of like me after a third cup of coffee.
Common mistake here: Don’t just pop them in when you remember; let the oven do its job first.
My personal hack: If you’re multi-tasking, toss in a baking sheet lined with parchment paper while you whisk. It’s like setting the stage for the stars.
The sensory cue: You’ll know the oven is ready when it feels like a warm hug as you open the door.
Step 2: Combine Dry Ingredients
In a bowl, mix up the flour, sugar, baking powder, and salt.
Why this step matters: This ensures the leavening agent is evenly distributed, leading to fluffy scones.
Common mistake here: Skipping the whisking—trust me, lumps are not your friends here.
The sensory cue: The smell of fresh flour should make you feel good—if not, you might just need another cup of tea.
Step 3: Cut in the Butter
Add in your cold butter cubes. Rub them between your fingers with the flour mix until it resembles coarse crumbs, or you can use a pastry cutter if you want to feel fancy.
Why this step matters: This creates those flaky layers we love so much. It’s the bond that holds this whole enterprise together.
Common mistake here: Overworking the butter. Seriously, you don’t need to be a bodybuilder with this step.
Anecdote: The last time I did this, my son Charlie wanted to ‘help’ (read: blast flour everywhere). It almost turned into a flour fight. But hey, that’s what kitchen fun is.
Step 4: Add Milk and Vanilla
Pour in the milk and vanilla. Gently fold until just combined.
Why this step matters: We want to keep the scone dough light and airy, not heavy. Think of it as a gentle hug for your ingredients.
Common mistake here: Over-mixing. Everything doesn’t need to be perfectly combined; lumps are okay!
My personal hack: If you’re using vanilla that’s been around a while, let it sit in the milk for a few, so it gets all cozy with it.
Step 5: Sprinkles!
Gently fold in the sprinkles, being careful not to overmix.
Why this step matters: We want random bursts of joy (the sprinkles!) in every bite.
Common mistake here: Over-mixing (yes, again). You want sprinkles, not a tie-dye effect.
Sensory cue: You should see little flashes of colour appearing evenly in the dough, like confetti on a summer day.
Step 6: Scoop and Bake
Using your cookie scoop, drop portions of dough onto your prepared baking sheet.
Why this step matters: This ensures uniform cooking, and no one wants a scone that’s burnt on one side and doughy on the other.
The secret nobody tells you: If you want extra crunch, add a touch of sugar on top before baking.
Anecdote: I serve these scones on mismatched plates because it gives the occasion an air of whimsy—like a kid’s birthday party, in my opinion.
Step 7: Bake
Pop those beauties in the oven for about 15-20 minutes, or until golden brown.
Why this step matters: Baking times may vary depending on oven temperament—I mean, we all have that one friend who’s a bit temperamental, right?
Common mistake: Not checking for doneness. Please do yourself a favour and peek in around 15 minutes.
The sensory cue: You’ll know they’re ready when your kitchen smells like a sweet birthday party—and you can see a lovely, golden hue on top.
Step 8: Icing (Optional, but Just Do It)
If you’re feeling fancy, whisk together some icing sugar with a few drops of milk for a lovely drizzle.
Why this step matters: A little bit of icing elevates these scones from nice to ‘Wow, you’re a rockstar!’
Common mistake: Going too heavy on the milk. Start with a teaspoon at a time until you get that perfect drizzling consistency.
Troubleshooting Real Life
-
If you burn the bottom: You can slice the burnt edges off, and if that doesn’t solve it, just embrace it with a dollop of jam on top. No one will know.
-
If you’re out of sprinkles: Swap in chocolate chips—they’re like little nuggets of happiness, anyway.
-
If you need to pause because of a doorbell: Just cover the bowl with a damp cloth. This keeps everything moist and ready for when you return.
-
If it’s just not working: Don’t stress. Just grab a packet of biscuits instead and try again later. Sometimes life needs a break.
The Serving Story
I serve these scones on a big, cheerful plate that looks like it’s seen several tea parties. There’s just something about that presentation that screams “happy day!” Honestly, sometimes my husband and I eat them while standing at the kitchen counter, shoving them into our mouths like we’re late for a ‘real’ meal.
Leftovers taste even better the next day, especially drizzled with a bit of extra icing, so don’t worry about making too much. Plus, who doesn’t love an excuse to scone-it-up again?
When I Make This
I usually make these birthday cake scones on the weekend, just because it feels like a nice way to kick off a lazy Saturday morning. While they bake, I might throw on some laundry (because that ever-present mountain isn’t going away), or sometimes I just stop everything and enjoy a bit of phone-free time in my comfy spot on the sofa.
We eat them at the kitchen table, often with a cuppa and whatever random Netflix series we’re binging. The cleanup takes about 10 minutes—because I believe in a clean kitchen—and it’s worth it just to see the smiles this little treat brings.
The Conversational Close
This recipe has seen me through birthdays, rainy weekends, and those days when a cupcake just wouldn’t cut it. It might not be perfect, but it’s mine. Plus, who needs perfection when you can have something this fun?
I’d love to hear if you make these scones—tag me on Instagram or just enjoy quietly! What’s your go-to comfort food? Mine changes, but right now, it’s definitely these birthday cake scones.

FAQ
-
Can I freeze these scones?
Absolutely! Just wrap them tightly before popping them in the freezer. They should last a couple of months, but let’s be real—good luck with that. -
How do I reheat them?
Pop them in the microwave for about 15 seconds, or you can put them in a warm oven for a few minutes. -
Can I make these gluten-free?
Sure! A good gluten-free flour blend should work just fine. Just keep an eye on the texture; you might need to adjust the liquid slightly. -
What if I don’t like sprinkles?
Don’t do what I did the first time—use chocolate chips, nuts, or even dried fruit like cranberries. -
Can I use this same recipe for regular scones?
Yes, just skip the sprinkles and icing if you prefer a more traditional flavor profile. Maybe add some cheese and chives if you’re feeling adventurous!
And there you have it. My heartfelt, slightly chaotic journey into the world of birthday cake scones. Here’s to many sweet moments ahead!
Birthday Cake Scones
Ingredients
Method
- Heat your oven to 400°F (200°C).
- In a bowl, mix up the flour, sugar, baking powder, and salt.
- Add in your cold butter cubes and rub them between your fingers until it resembles coarse crumbs.
- Pour in the milk and vanilla, gently fold until just combined.
- Gently fold in the sprinkles being careful not to overmix.
- Using a cookie scoop, drop portions of dough onto a prepared baking sheet.
- Bake for about 15-20 minutes or until golden brown.
- To make icing, whisk together icing sugar with milk for a drizzle.