Artisan Pizza Dough: The Recipe That Saved My Sanity One Night
The first time I tried to make pizza dough at home, I created something that looked like the lovechild of a science experiment gone wrong and a sad pancake. I was knee-deep in flour, tossing aside tears (because who even cries over dough? Apparently, I do), while my husband tried to offer moral support by hiding his laughter behind an ill-timed cough. “A journey of a thousand miles begins with a single step,” he said, grinning. I didn’t want to hear that. I wanted pizza—not a motivational quote! But that was over ten years ago, and now, this artisan pizza dough recipe is what I whip up to regain my sanity whenever life gets a bit too hectic. You know, like when you’ve had a day that requires pizza therapy, or when it’s raining cats and dogs, and the kids start fighting over the last cookie (spoiler: it was dodgy, day-old stuff from the cupboard). Let me save you from the frustration of that first awful attempt.
Why This Matters
Okay, let’s be real—pizza is often the answer, right? Whether you’re craving comfort food after a long day at work, desperate to impress a friend who’s poppin’ over unexpectedly, or just trying to get the kids to eat something that resembles a proper meal, artisan pizza dough is your answer. This is what to make when you’ve just had a really tough day and need something to carry you through the evening without breaking the bank on take-out. With this dough, you’re not just making dinner; you’re crafting an experience. And trust me, there is nothing quite like the smell of fresh dough baking in the oven, coaxing everyone into the kitchen.
Before You Start
-
If you only have all-purpose flour instead of bread flour, it will still work, but your crust might not be quite as chewy.
-
Don’t fret if you don’t have a mixer with a dough hook—we didn’t have one for years! Just knead by hand. It’s a bit of a workout, but also strangely therapeutic (and who doesn’t need to work off that last slice of cake?).
-
If your little one decides it’s time to melt down while the dough is rising, just cover it with a damp cloth and walk away—it will be fine for at least 30 minutes.
-
In case you have a cheeky glass of wine while you’re at it—and who could blame you?—I recommend a nice Italian red to sip on while you cook.
Ingredients
-
4 cups bread flour (I use Strong White Bread Flour because it gives that lovely chewiness)
-
1 ½ tsp instant yeast (I swear by the ‘Allinson’ brand)
-
1 ½ tsp salt (a big pinch of sea salt works perfectly; just stay away from table salt—yuck)
-
1 ¾ cups warm water (the kind that feels nice, not boiling—trust me, it’ll ruin your dough)
-
1 tbsp olive oil (I have a crush on ‘Filippo Berio’—great stuff for drizzling and cooking alike)
-
Optional: cornmeal for dusting (makes all the difference when sliding your pizza onto a hot stone)

Making the Dough: Step-by-Step
-
Mix the Dry Ingredients
Start by whisking the bread flour, yeast, and salt together in a bowl.
Why this matters: You want the salt and yeast to be evenly distributed so they don’t interfere wackily during the fermentation phase (that sounds scientist-y right?).
My personal hack: Use a whisk—so much faster than a spoon.As a side note, this was around the time my daughter, Lucy, decided to “help” and emptied half a bag of flour into the bowl. I had to laugh while Googling “how to save flour” during a dough disaster.
-
Add Water and Oil
Pour in the warm water and olive oil. Mix it all together until it’s a sticky, shaggy mass.
Common mistake here: Don’t overthink this part—if it feels sticky, you’re on the right path!
If you’re multi-tasking: This is when you can turn the oven on low or prep your toppings while your dough starts to come together.Little Lucy is back with a wooden spoon! I think I’m creating quite a few little helpers over the years… one day at a time.
-
Knead the Dough
Dump the dough onto a floured surface and knead it for about 8-10 minutes until it’s smooth.
Sensory cue: You’ll know it’s ready when it feels smooth and elastic. It shouldn’t stick to your hands as much!
Common mistake here: If your dough is too dry, just add splashes of water a teaspoon at a time.Also, I’m not gonna lie, I used to rush this step because I thought, “Meh, it’s just dough.” Then I burnt it two Tuesdays in a row. Learn from my mistakes, okay?
-
First Rise
Lightly oil a bowl and place the dough in it, turning it once to coat. Cover it with a damp cloth. Let it rise for 1-2 hours in a warm place—until it doubles in size.
Why this step matters: Yeast is like little party animals; they get busy and create the fluffiness of the dough!
If it’s a chilly day: I stick it in the oven with just the light on. It’s kinda like a dough spa day.Dad always shows up right about now for "Pizza time!" It may not be, but this dough holds promise of what’s to come.
-
Punching Down and Second Rise
After the first rise, punch the dough down to release the air. Then shape it into a ball, cover it again, and let it rise for another 30-60 minutes.
Common mistake: Some folks skip this step—don’t, or you’ll end up with a pizza that’s too puffy!
What to do if your toddler starts melting down: Have a batch of cookies ready. Seriously, baking heals emotional wounds.Quick tip: This is also a great time to distract myself with Netflix while the real kitchen magic happens.
-
Shaping Your Pizza
Now divide your dough into equal portions—this recipe makes about three pizzas, depending on how greedy you feel (I often feel very greedy). Roll each piece into a ball and let it rest for 15 minutes.
Why this matters: Resting helps the gluten relax—trust me, it makes a world of difference.
My personal hack: If you want it thinner, stretch it like you’re showing off a big piece of bubblegum.This is the part where I throw a dance party in the kitchen, attempting to make my kids laugh while shaping dough!
-
Preheat the Oven
Make sure your oven is preheated to the highest it can go, usually around 250°C (482°F). Add a pizza stone or a baking sheet in there to heat up. You want that baby hot!
Common mistake: Not allowing everything to preheat. Lifelong lesson I learned the hard way.
If you don’t have a pizza stone: Don’t sweat it; a baking tray works just fine.My husband thinks I have a sixth sense when the oven is at the right temperature. Spoiler alert—it’s just practice.
-
Rolling Out the Dough
Start shaping it into a circle on a floured surface. Don’t be too precious about it; the odd patch here and there adds character!
Sensory cue: When you’re rolling, listen for the tiny crackles of the dough; it just means your work is paying off.
Remember: This is your pizza. It doesn’t need to look perfect—life is more fun with a few imperfections!A little dance move here, a sprinkle of flour there… the chaos is creative. Or something like that.
Troubleshooting Real Life
-
If you burn the bottom: Don’t panic. If you catch it in time, slide a spatula underneath and flip it over. Most of the time you can salvage it. If it’s burnt to a crisp, cut off the bad bits and call it “artisan” for Instagram.
-
If you’re out of yeast: Try using baking powder instead. It won’t have the same flavour, but it will do the trick!
-
If you need to pause because there’s a four-alarm toddler meltdown: Just cover the dough with a damp towel and go save the day. It’ll be fine for at least 30 minutes.
-
If it’s just not working: There’s always take-out—no guilt attached! Sometimes you need to accept that we’re all allowed a break from Pinterest-perfect expectations now and then.
Serving It Up
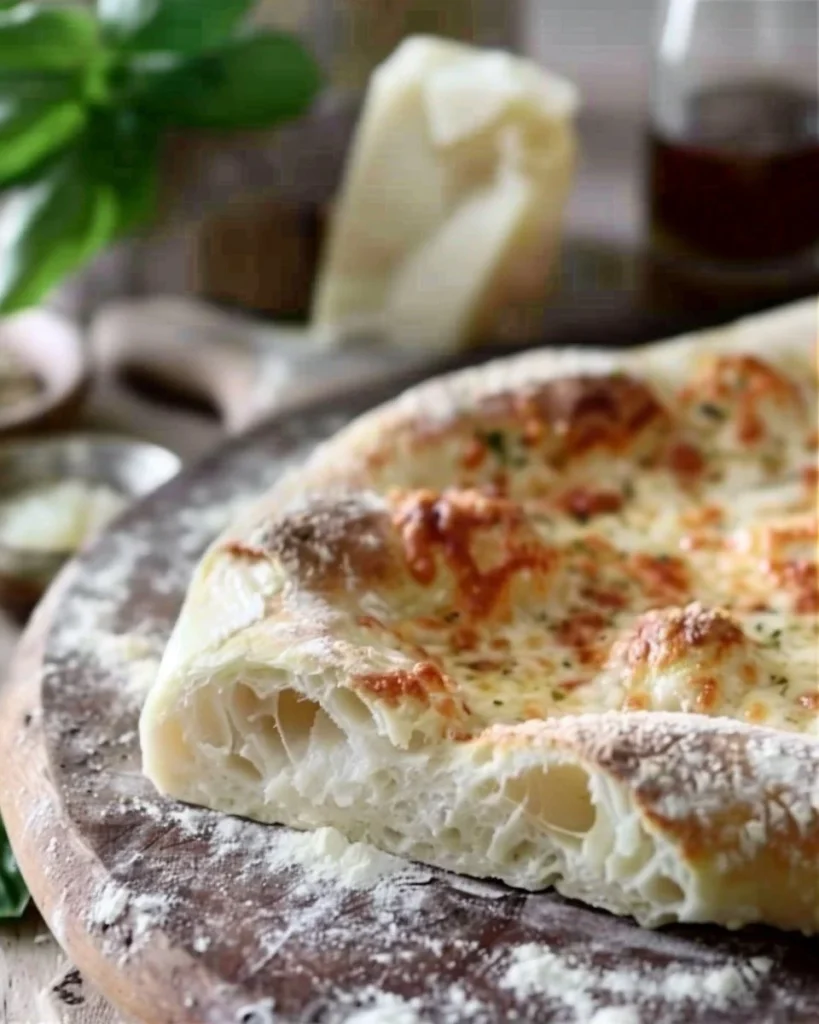
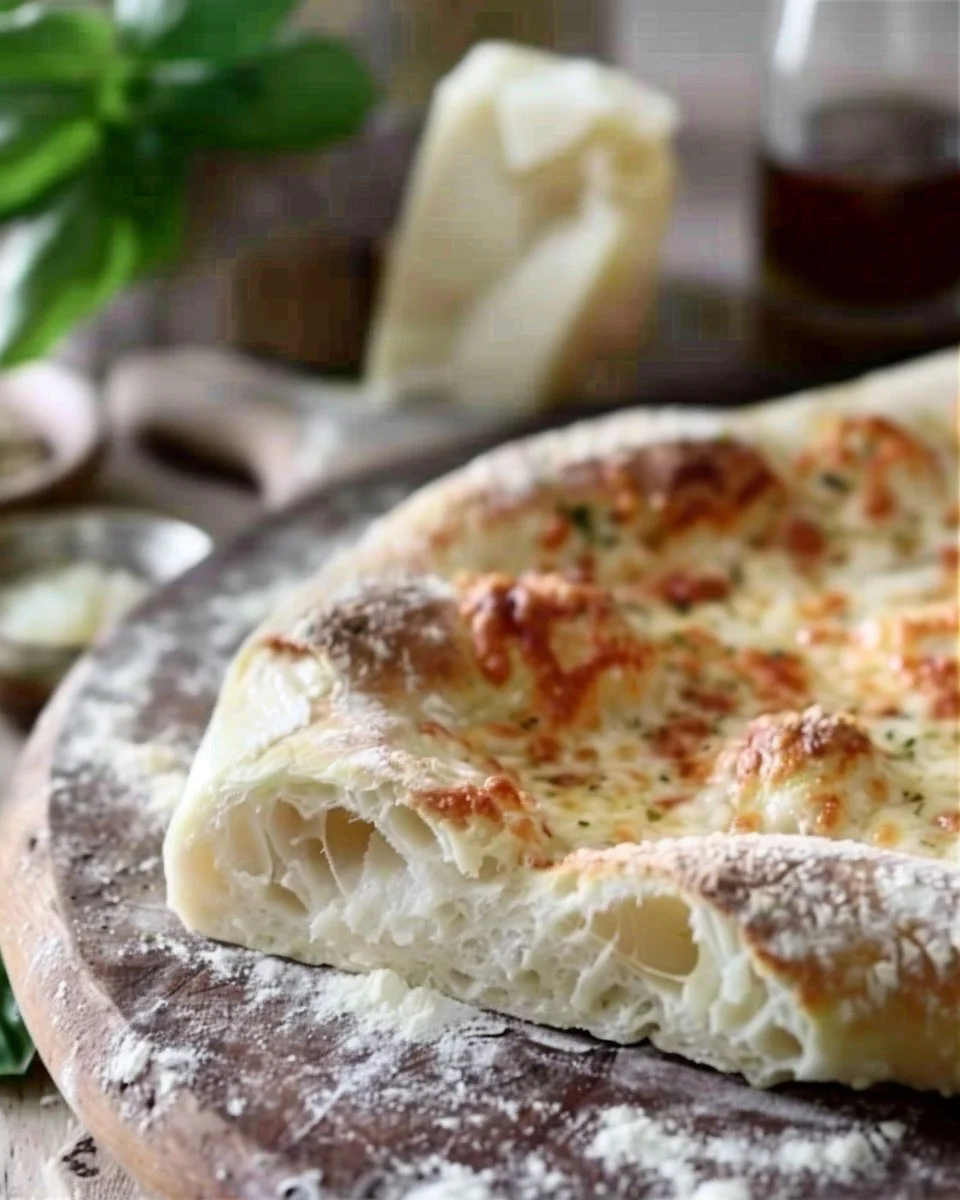
I love serving this on a wooden board surrounded by various toppings—things like fresh basil, tomato sauce, and all the cheese. You just get that lovely rustic feel! We always end up sitting around the table, spiralling into discussions that range from what’s for dessert to which movies we should rewatch (trust me, it’s always “The Princess Bride”).
Leftovers? Don’t worry. They actually taste even better after spending a night in the fridge. I sometimes whip them out for breakfast if I’m feeling particularly rebellious.
When I Make This
I usually make this on a Friday night, mainly because I’ve earned it after a whole week of the circus we call life. While the dough rises, I either catch up on laundry (it’s a never-ending cycle, I swear) or occasionally fold it while bingeing on whatever horrible reality show is on. We eat it at our dining table with candles lit—sometimes even with “a fancy tablecloth” (which is really just a nice, clean dish towel I forgot to put up from last time). Clean up takes about 20 minutes, but who cares? When it’s family pizza night, it’s about bonding more than about how messy my kitchen looks afterward.
The Conversational Close
This artisan pizza dough has seen me through all sorts of trials—from toddler tantrums to budget constraints. It might not look perfect every time, but it’s mine, and every time I knead it, I’m reminded of all the beautiful things that surround our meals. I’d love to hear if you make it—really! Share the messiness of your kitchen adventures with me. Okay, I need to know: What’s your go-to comfort food? It changes for me, but right now, it’s definitely this dough.
Now, who’s ready to elevate their pizza game?

Artisan Pizza Dough
Ingredients
Method
- Whisk together bread flour, yeast, and salt in a bowl.
- Pour in warm water and olive oil. Mix until it forms a sticky, shaggy mass.
- Dump the dough onto a floured surface and knead for 8-10 minutes until smooth and elastic.
- Lightly oil a bowl, place the dough inside, and cover with a damp cloth. Let rise for 1-2 hours until doubled in size.
- Punch down the dough to release the air, shape into a ball, cover, and let it rise for another 30-60 minutes.
- Divide the dough into equal portions to make about three pizzas, rolling each piece into a ball and resting for 15 minutes.
- Preheat your oven to its highest setting (around 250°C or 482°F) and heat a pizza stone or baking sheet inside.
- On a floured surface, shape the dough into circles, allowing some imperfections for character.