Oreo Truffles: A Sweet Little Shortcut for When Life Gets Crazy
The first time I attempted to make Oreo truffles, I had a bit of a meltdown. And not a graceful, contained kind of meltdown—more like a “why-is-there-cream-cheese-everywhere” sort of moment. It was one of those chaotic nights when my kids were bouncing off the walls, the dog ate half my recipe notes, and I was trying to multitask between dinner prep and a conference call. When my husband walked in and bravely asked, “What’s happening in here?” I just stared at him, hands covered in cookie crumbs, and thought, “I’ll never get through this.” Ah, sweet self-doubt, my old friend!
Now, I whip up these truffles any time I need a sure-fire treat—birthdays, holidays, or just because I want something devilishly sweet without leaving my house. Let’s be real, Oreo truffles are like little bites of happiness, and they come together faster than it takes to scroll through Instagram for the perfect snack idea. Trust me, they’re so easy you’ll wonder why you didn’t do this sooner.
Why This Matters
So, what’s so special about these little gems? Okay, let’s be real: they’re the recipe you whip out when you need to impress your guests without breaking a sweat or your wallet. It’s what you make when the day has gone completely sideways, and you just want to indulge a bit. I mean, who can resist a velvety sweet truffle that practically melts in your mouth? Plus, they look pretty fancy on a plate—newsflash, they’re just crushed cookies and cream cheese!
You don’t have to have MasterChef skills to make these; you just need a food processor and a pinch of determination. Each bite takes you back to simpler times when we didn’t have to juggle work-life balance like a circus act. And let’s be honest, sometimes you just want a treat that says, “Hey, you’re doing okay!”
Before You Start
- If you only have regular Oreos instead of the Double Stuf ones, don’t panic! They’ll still taste delicious, just not as gooey.
- The one tool that makes this infinitely easier is a food processor—you’ll have crushed cookies in seconds. (If you don’t own one, consider using a plastic bag and a rolling pin. It’s therapeutic, trust me.)
- If your kids start melting down while you’re coating the truffles in chocolate (this WILL happen), keep a batch of mini marshmallows in the cupboard for emergency snacking.
- The exact wine to pour while cooking this? I’d say a nice Merlot for some adult relaxation, but if you need something a bit more kid-friendly, a fizzy lemonade works wonders.
Ingredients List
- Oreo cookies: 1 package (I use the Double Stuf because, you know, more is more)
- Cream cheese: 8 oz, softened (I forgot to take it out of the fridge once—don’t do that, it just won’t mix well)
- Chocolate chips: 2 cups (I usually go for semi-sweet because it balances the sweetness perfectly)
- Sprinkles or cocoa powder (optional): for rolling (because why not have a bit of extra fun, right?)
Step-by-Step Instructions
Step 1: Crushing Those Cookies
-
The Practical Instruction: Toss the Oreo cookies into a food processor and pulse until they resemble fine crumbs.
-
The Human Insight: Why this step matters: Crushed cookies create the base of our truffles and make mixing a breeze.
-
Common mistake here: Don’t pulse too much or you’ll end up with Oreo dust. Not great for truffles—think gravel instead of a velvety texture. Just pulse until they are crumbly, not powdered.
-
The sensory cue: You’ll know it’s ready when you can’t help but taste a little—and you totally will.
-
Anecdote: This is where my daughter Maya always joins in. She loves to be my ‘cookie monster’ and “help” with the tasting. (Okay, she mostly just eats the crumbs off the sides. No complaints from me!)
Step 2: The Cheese Mix
-
The Practical Instruction: Dump the crumbs into a bowl and mix in the softened cream cheese until fully combined.
-
Why this step matters: The cream cheese binds the cookies together, creating that rich, truffle-like centre that we all crave.
-
Common mistake here: Not having the cream cheese room temperature is killer. You’ll find yourself fighting with lumps that refuse to dissolve. I know, because I’ve been there.
-
My personal hack: I microwave the cream cheese for about 15 seconds to soften it up if I forget to pull it out in advance.
-
Anecdote: This step kind of reminds me of my grandma’s cheesecake batter—she’d always say, “Just give it a good mix!” I think every bowl of hers had some kind of love mixed in.
Step 3: Shaping the Truffles
-
The Practical Instruction: Roll the mixture into small balls, about the size of a tablespoon.
-
Why this step matters: The more uniform they are, the prettier they’ll look when coated. And let’s be honest, we eat with our eyes first.
-
Common mistake here: Making them too big. I did that once, and let me tell you, it was a truffle-overload situation. Less is more, folks.
-
If you’re multi-tasking: This is a good time to put on your favourite playlist or a podcast. You’ll want that good energy flowing while you roll.
-
Anecdote: I used to make these with my best friend Julie, and I’d always shove an extra-large one in my mouth just to tease her. I’ll let you guess who ended up getting chocolate everywhere…
Step 4: Chill and Set Your Truffles
-
The Practical Instruction: Place your truffle balls on a baking sheet lined with parchment and pop them in the fridge for at least 30 minutes.
-
Why this step matters: Chilling firms them up, making them easier to coat in chocolate later.
-
The sensory cue: You’ll know they’re ready when they feel firm and slightly cold to the touch.
-
Anecdote: This always reminds me of waiting for the dessert at my mum’s Sunday dinners. The anticipation nearly killed me.
Step 5: Melting the Chocolate
-
The Practical Instruction: Melt your chocolate chips in a microwave-safe bowl—heat in 30-second intervals, stirring in between until smooth.
-
Why this step matters: Properly melting chocolate is key to achieving that gorgeous, glossy coating.
-
Common mistake here: Overheating it. Once you scorch chocolate, there’s no coming back.
-
If you’re multi-tasking: Make sure to prep whatever toppings you want while the chocolate is melting!
-
Anecdote: I have this vivid memory of my ex-roommate trying to melt chocolate on the stove, and it all ended up looking like a science experiment gone wrong. Now I always opt for microwave melting.
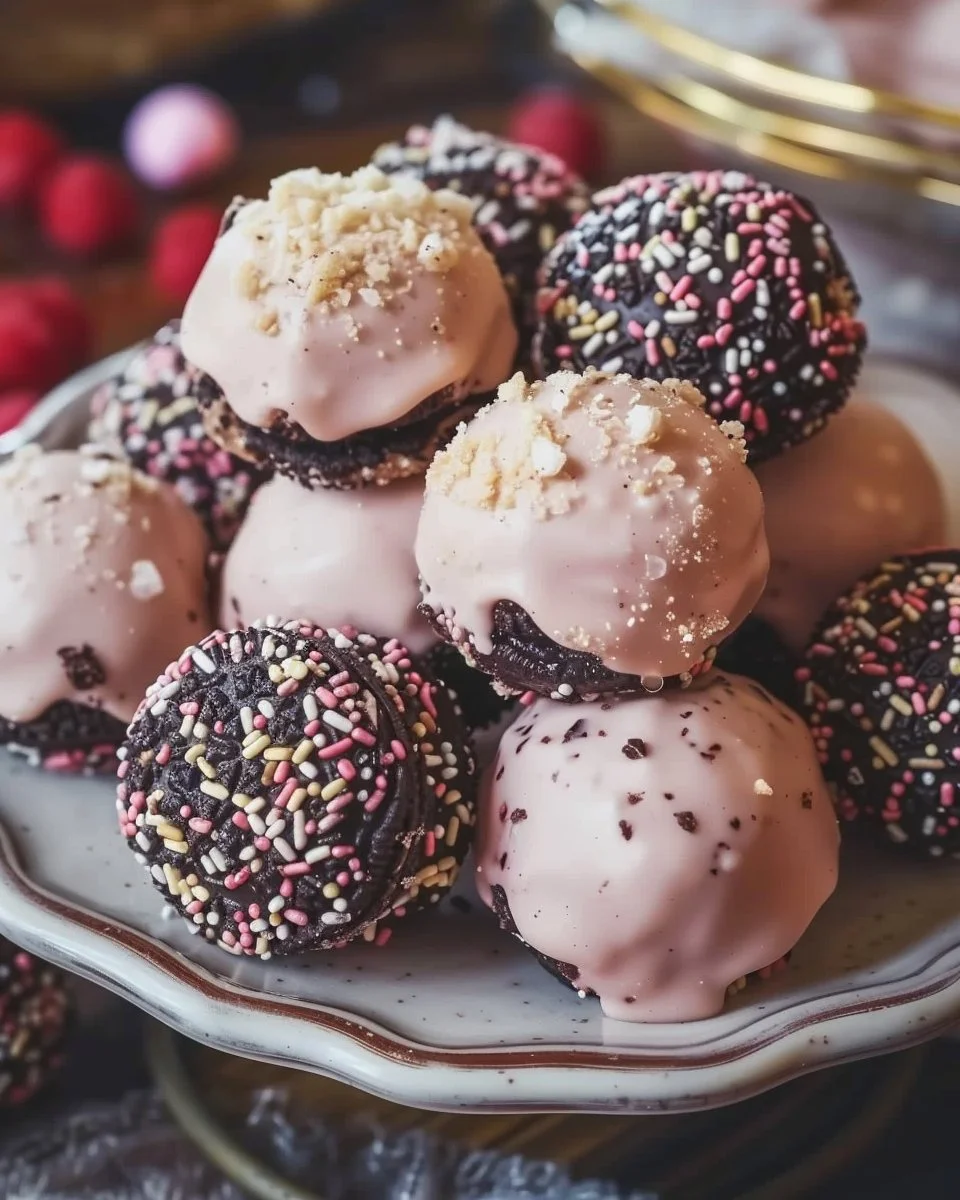
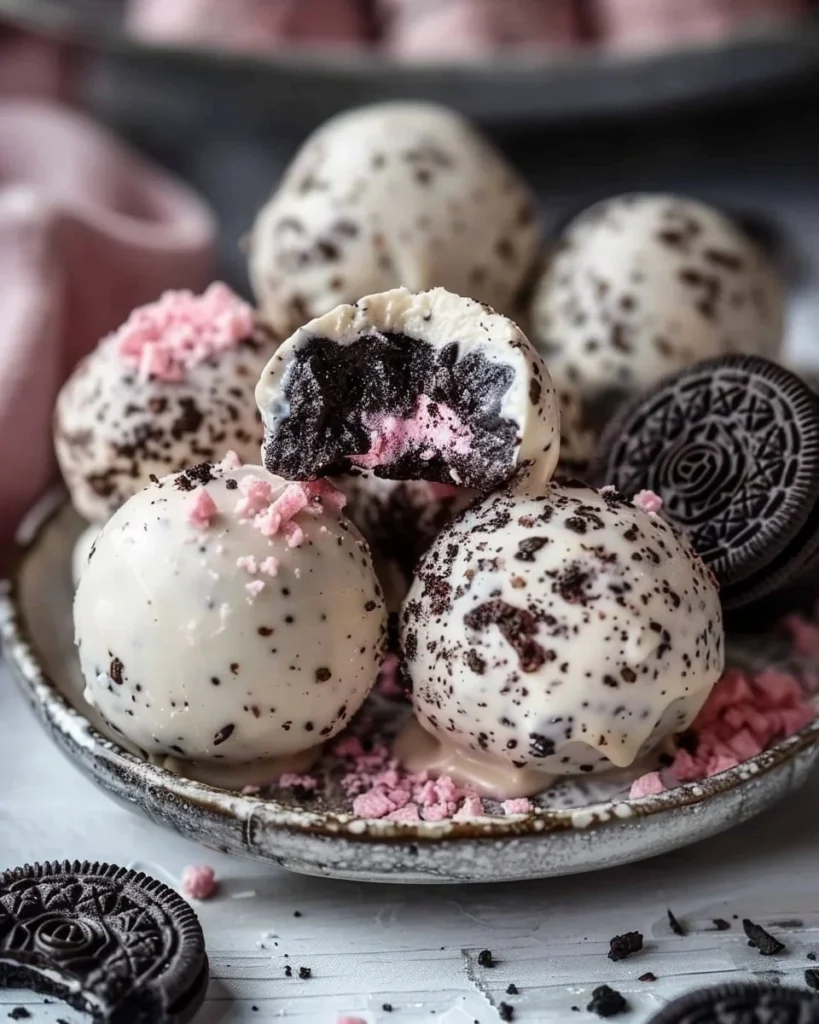
Step 6: Coat the Truffles
-
The Practical Instruction: Dip a chilled truffle into the melted chocolate, covering it entirely. Use a fork to lift it out and let the excess chocolate drip off before placing it back on the parchment.
-
Why this step matters: This is where the magic happens! The chocolate coating is what turns these from “meh” to “whoa, give me more!”
-
The sensory cue: You’ll know you’ve done it right when the chocolate glistens and is perfectly even without drips.
-
Anecdote: This is where my husband, Mark, usually attempts to help but ends up with chocolate-covered fingers and giggles. It’s more mess than help, but he does try!
Step 7: Add Some Flare
-
The Practical Instruction: While the chocolate is still wet, sprinkle on your chosen toppings or cocoa powder.
-
Why this step matters: It adds personality and makes them even more eye-catching—because let’s face it, we eat with our eyes first.
-
Anecdote: My son, Lucas, thinks sprinkles make everything better. Sometimes, I just let the kids go wild with the topping choices. You might get bizarre combinations, but hey, it’s all fun!
Step 8: Chill Again
-
The Practical Instruction: Once all your truffles are coated and decorated, put them back in the fridge until the chocolate is set.
-
The sensory cue: You’ll know they’re ready when you can touch the chocolate without it sticking to your finger.
Serving Them Up
I serve these little gems on a pretty platter—all fancy-like—because I think dessert deserves a nice presentation. But let’s be real, sometimes I’ll just reach straight for the fridge and eat them straight from the container. The indecision is real, my friends!
The first time I made these for a gathering, they disappeared faster than I could count. And leftovers? They taste even better the next day. Seriously. The flavours have time to meld, and the truffles get super decadent. Just try not to gloat when someone raves about your baking prowess!
The When I Make This Story
I usually whip these bad boys up on a Friday night. There’s something about welcoming the weekend with a sweet treat that feels like a little reward after a long week. While I’m shaping and coating, I’ll often end up folding laundry or catching up on reality TV. (Shh, don’t tell anyone!)
We eat them cozy-style on the couch while we binge-watch our latest obsession. Cleanup takes about 20 minutes, but honestly, I don’t care. I usually make the kids do it because it’s their mess too, but hey, that’s parenting for you, right?
The Conversational Close
So, here it is: this recipe has seen me through countless Friday nights, family gatherings, and even a couple of last-minute gifts when I was too lazy to head out to the store. They might not be gourmet, but they’re made with love (even if most of it is just sugar). I’ll level with you—I’m no baking expert, but these are mine and they mean something.
Have you tried making these? Drop me a comment or tag me if you give them a go! I’d love to know how they turn out in your kitchen. What’s your go-to comfort food? Mine might change over time, but for now, I’m all about these delicious, melty Oreo truffles.

Oreo Truffles
Ingredients
Method
- Toss the Oreo cookies into a food processor and pulse until they resemble fine crumbs.
- Dump the crumbs into a bowl and mix in the softened cream cheese until fully combined.
- Roll the mixture into small balls, about the size of a tablespoon.
- Place your truffle balls on a baking sheet lined with parchment and pop them in the fridge for at least 30 minutes.
- Melt your chocolate chips in a microwave-safe bowl—heat in 30-second intervals, stirring in between until smooth.
- Dip a chilled truffle into the melted chocolate, covering it entirely. Use a fork to lift it out and let the excess chocolate drip off before placing it back on the parchment.
- While the chocolate is still wet, sprinkle on your chosen toppings or cocoa powder.
- Once all your truffles are coated and decorated, put them back in the fridge until the chocolate is set.
- Serve the truffles on a pretty platter or enjoy them straight from the container!