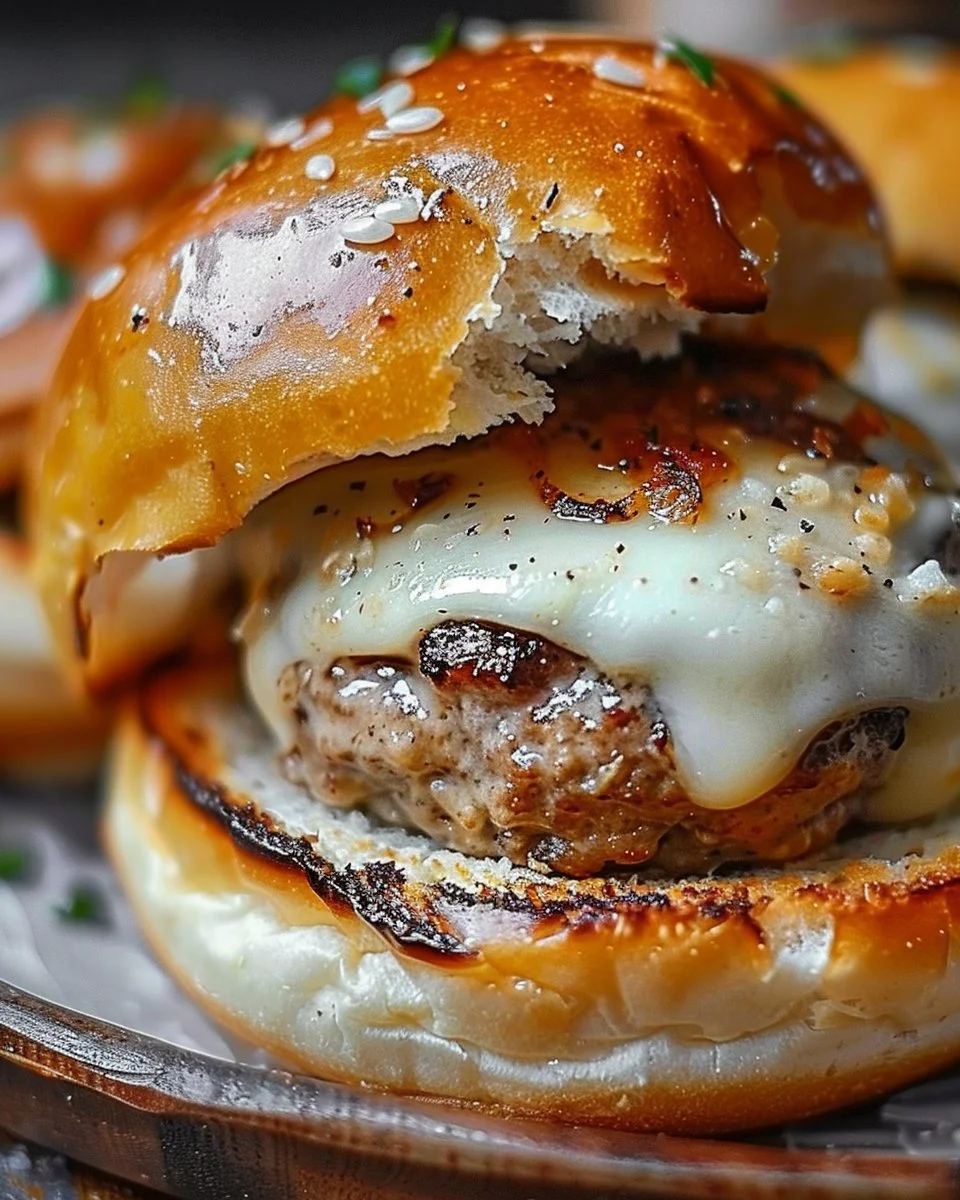
The Ultimate Comfort: Garlic Parmesan Cheeseburger Bombs
The first time I stumbled upon a recipe for Garlic Parmesan Cheeseburger Bombs, I just knew I had to try it. My kitchen was filled with the chaos of half-opened bags of flour, the last couple of carrots that my son claimed he’d eat (he didn’t), and a puppy trying to steal my measuring spoons. Oh, and my husband was on the phone arguing with our internet provider about speed issues—don’t ask. I finally managed to make a batch of these heavenly balls of joy, and as I pulled the tray out of the oven, I took one smell and was instantly transported back to my childhood. It was like those golden, cheesy stuffed rolls my grandma used to make every Friday night before family movie marathons. You know what I mean—the ones that made you feel warm and fuzzy inside, despite the chaos around?
Now, trust me when I tell you, the first batch was an absolute disaster. Picture me, flour in my hair, cheese spilling all over the floor, and my kids—well, you can imagine their excitement. Long story short, I failed spectacularly. But when my friend Liz came over, took one look at my sad attempts, and said, “You just gotta learn how to embrace the delightful mess,” everything clicked. Fast forward a few experiments (and a bit of practice), and now I can whip these up with my eyes closed.
So grab your apron, pour a glass of wine—or juice if that’s your vibe—and let’s dig into how to make these Garlic Parmesan Cheeseburger Bombs that have become a staple in our home.
Why This Matters
Okay, let’s be real. This isn’t just about stuffing dough with meat and cheese; it’s about rekindling that deep connection to comfort food. You know those days when nothing seems to go right? I make these and it’s like everything feels alright again, even if just for a moment. It’s the ultimate “I’m a kickass home cook” move with minimal fuss (and maximum flavor). You can impress your friends or even your grumpy toddler. You get to have fun, and they get to eat cheesy, beefy goodness. Plus, who wouldn’t feel better after crushing a cheeseburger that’s cloaked in garlic butter and Parmesan?
Before You Start
-
If you only have all-purpose flour instead of dough, I’m proud of you for even trying… But here’s the thing. Yes, you can technically make your own dough, but let’s save that mess for another day. Just pick some pre-made biscuit dough from the fridge section—trust me, it’s a time saver.
-
The one tool that makes this infinitely easier: Baking parchment. Seriously, if you don’t have it, I don’t know you. It saves you from the eternal struggle of scrubbing pans.
-
What to do if your toddler starts melting down at step 3: Have a stash of snacks nearby. Maybe some fruit snacks or popcorn. Works like a charm—distract them while you keep things cooking.
-
The exact wine to pour while cooking: If you’re feeling fancy, a nice Sauvignon Blanc pairs perfectly with the garlicky flavours, or just stick with your favourite brand of tea—no judgement here.
Ingredients List with Personal Notes
Here’s what you’ll need:
- 1 lb (450g) ground beef (I usually grab whatever’s on sale because, can we talk about this? Grocery bills.)
- 1 tsp salt (I use sea salt since that’s what my grandma always kept in her pantry.)
- 1 tsp black pepper (And yes, feel free to add more if you like a little kick.)
- 1 cup shredded cheddar cheese (You can use a fancy sharp cheddar or just whatever’s taking up space in your fridge.)
- 1 can (16 oz) refrigerated biscuit dough (Honestly, if you wanna feel all chef-y, go for homemade; just don’t cry if it doesn’t work out—like I did.)
- 1/4 cup grated Parmesan cheese (A little sprinkle never hurt anyone, right? Plus, it’s a must for that ‘restaurant vibe.’)
- 2 tbsp unsalted butter, melted (Forget the fancy stuff; it’s meant to make everything taste better.)
- 3 cloves garlic, minced (Or five if you’re like me and believe garlic can solve most problems.)
- Optional: parsley, chopped (For that pop of color if you’re into that).
The Step-by-Step with Stories
Step 1: The Ground Beef Shenanigans
Practical Instruction: Begin by preheating your oven to 375°F (190°C). Grab a skillet and cook the ground beef over medium heat until browned, about 5-7 minutes. Drain any excess grease.
Why this step matters: Cooking the beef properly will ensure your bombs don’t become a greasy mess. Nobody wants that.
Common mistake here: Forgetting to drain the excess fat. Trust me, I’ve done it before, and it’s just… gross.
My personal hack: Throw a splash of Worcestershire sauce in with the beef while it cooks. It gives you that extra oomph.
Anecdote: Cooking ground beef always reminds me of that one Thanksgiving when I mistakenly grabbed the cinnamon for the stuffing. My family didn’t catch it until they took a bite, and it was too late. We still laugh about it today.
Step 2: Mastering the Dough
Practical Instruction: While the beef’s cooking, grab that biscuit dough and separate it into 8 equal portions.
The sensory cue: The dough should feel soft but not sticky. You can toss a little flour on your hands if it’s being difficult.
Common mistake here: Rushing and tearing the dough instead of gently pulling it apart. Treat it like a beloved pet.
Anecdote: My kids love helping with this part, though half the time they end up just molding the dough into alien shapes. We had a “cheeseburger alien” incident once that I honestly still can’t get over.
Step 3: Stuffing the Bombs
Practical Instruction: In a bowl, mix the cooked beef, cheddar cheese, salt, and pepper. Take a portion of dough, flatten it, scoop in a bit of the beef mixture, and wrap it up.
Why this step matters: This is the heart of the bombs—get all the cheesy goodness inside.
If you need to pause because of a kid emergency: Slip those beauties onto a tray and just cover them with a towel until you can get back. They won’t mind sitting for a bit, promise.
Step 4: Roll ‘Em and Bake
Practical Instruction: Line a baking tray with parchment paper, place the stuffed dough balls seam side down, and bake for 10-12 minutes until they are golden brown.
My personal hack: Brush them with garlic butter (melted butter mixed with minced garlic) right before they finish baking. This will give you an incredible crust.
Anecdote: The smell wafting through the house during this time is almost as good as baked cookies. My husband has been known to come running, trying to find out what’s baking.
Troubleshooting Real Life
-
If you burn the bottom: Don’t panic. Just scrape it lightly with a spatula. The tops will still be golden.
-
If you’re out of cheddar: Gouda works just as well. Heck, use whatever you have lying around; it just means you’re being resourceful.
-
If it’s just not working: Why not grab some frozen pizza? Hey, it happens to the best of us.
The Serving Story
I usually serve these bombs in a big, messy pile on a plate with some extra Parmesan cheese sprinkled on top. We dig in family-style, and let me tell you, it looks like a little mountain of cheeseburger goodness. Pair them with some fresh veggies or a chilled salad. If I’m feeling lazy, we eat directly from the pan, while I hope to God no one else notices how much I’ve burned the bottom.
When I Make This
I tend to whip these up on a Friday after a long week at work because it wraps up the week quite nicely, don’t you think? While they bake, I usually set up some games for family night or catch up on laundry (oh, the gloriousness of multitasking). We eat at the kitchen island, usually with the kids arguing over who gets the first pick, while the dog performs his excellent begging routine right next to their chairs. Cleanup takes about 15 minutes if you’re smart about it, especially if you’ve switched to paper plates (I’m not above that life).
The Conversational Close
This recipe isn’t just food; it’s my secret little joy—one that has seen me through late nights, chaotic evenings, and family movie nights. It might not be perfect, but it’s ours, and there’s something incredibly comforting about that.
I’d absolutely love to hear how yours turn out—tag me or just enjoy in your own quiet space. So, what’s your go-to comfort food? For me, it always circles back to these Garlic Parmesan Cheeseburger Bombs. Cheers to delicious chaos! 🍔✨

FAQ
Can I make these ahead of time? Yes, you can prepare them and keep them in the fridge before baking. Just let them come to room temperature before you pop them in the oven.
What’s the best way to reheat them? Stick them in the oven for a few minutes on low heat. Microwaving can make them a bit soggy, but we all have those days.
Can I use turkey or chicken instead of beef? Absolutely! Just be cautious about cooking times and flavors. You might need extra seasoning.
Happy cooking! 🧄🧀

Garlic Parmesan Cheeseburger Bombs
Ingredients
Method
- Preheat your oven to 375°F (190°C).
- In a skillet, cook the ground beef over medium heat until browned, about 5-7 minutes. Drain any excess grease.
- While the beef is cooking, separate the biscuit dough into 8 equal portions.
- In a bowl, mix the cooked beef, cheddar cheese, salt, and pepper.
- Take a portion of dough, flatten it, scoop in a bit of the beef mixture, and wrap it up.
- Line a baking tray with parchment paper, place the stuffed dough balls seam side down, and bake for 10-12 minutes until golden brown.
- Brush them with garlic butter (melted butter mixed with minced garlic) right before they finish baking.