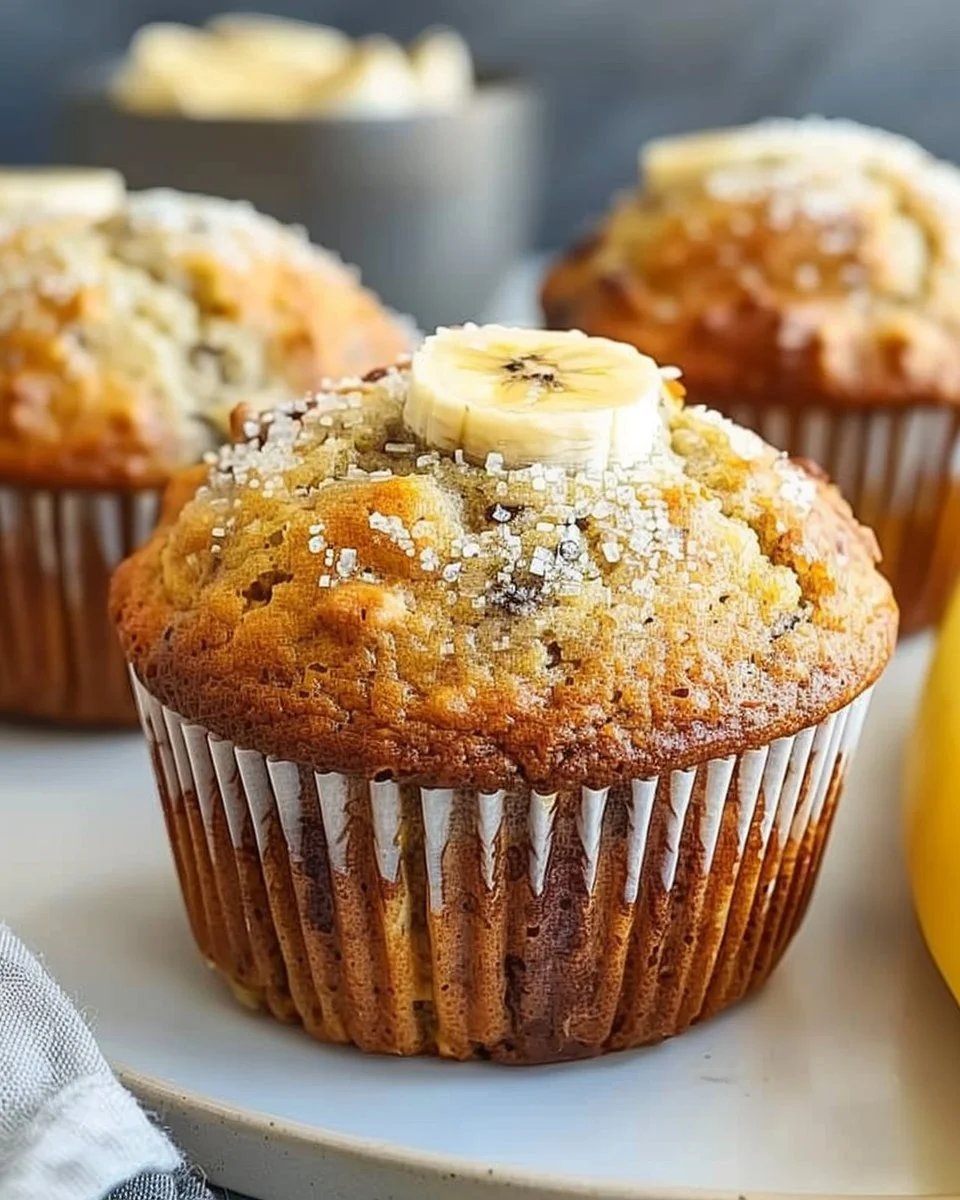
The Best Ever Banana Muffins: A Slice of Happiness in Every Bite
The first time I waded into banana muffin territory, I thought I was doing well. I had the ingredients lined up, the bananas mashed, the oven preheating—it felt like I was on a cooking show! But then, oh boy, the smell filled the kitchen—not the warm, inviting aroma of sweet bananas mingling with nutty brown sugar, but rather an odd burnt rubber scent. Yep, the muffins had morphed into little hockey pucks somewhere between mixing and baking. My son, Casey, wandered in, took one whiff, and said, “Mum, do we need to order pizza?” That was five years ago. Fast forward to now, and these muffins have become my go-to treat whenever the bananas start gathering that unflattering brown spot on the counter. Seriously, I can whip these up when I’m feeling contemplative or when I’ve just heard that familiar, “What’s there to eat?” question from my husband that signals impending snack desperation.
Why This Matters
Okay, let’s be real: we’ve all been there, rummaging around for something tasty, only to find it’s either the dried-up crust of the last takeaway or a bunch of sad-looking bananas. But were those bananas truly sad? No! They’re just waiting for a little love and attention to become something magical. These banana muffins not only save the day; they also say, "I care" without any cheesy gestures. They’re comforting, convenient, and, let’s face it, most of us could use a win in the kitchen now and then.
Before You Start
- Banana ripeness: If you think “the blacker, the better” is just a phrase I made up, trust me on this one. Those mushy bananas have the sweetest flavour. So don’t toss them when they turn dark; they’re ready to shine.
- Mixing bowls: Use a large bowl for mixing the batter but keep a smaller one handy for any rogue ingredients you might decide to add. (I use a rogue bowl as my ‘inspiration bowl’—more on that later.)
- Quick tip: Got tiny hands around? Make a mini baking station where they can mash their own bananas. It’s messy, yes, but the giggles are worth every splat.
- Perfect song: It’s a baking tradition in my house to put on Abbey Road while I cook—there’s just something about those tunes that makes everything feel more fun.
Ingredients (with personal notes)
- 3 ripe bananas, mashed (they should look like they’ve been through a rough night, but that just means they’re perfect)
- 1/3 cup melted butter (I usually grab whatever’s in the fridge—margarine works too, but don’t tell my grandma)
- 1/2 cup sugar (I use golden caster sugar for that lovely caramel edge, but white sugar does the trick too)
- 1 egg, beaten (if you’re down to the dregs of your carton, don’t fret; a flax egg works in a pinch—just mix 1 tbsp flaxseed with 2.5 tbsp water and let it sit for a bit)
- 1 teaspoon vanilla extract (I’m partial to the good stuff, but we’ve all resorted to that sickly-sweet imitation at times, right?)
- 1 teaspoon baking soda (this is the magic that’s going to help those muffins rise!)
- Pinch of salt (I always use sea salt; it’s the little things, you know?)
- 1 cup all-purpose flour (I’ve definitely used whole wheat before—don’t do this if you’re looking for fluffy muffins, though)
- Optional: 1/2 cup chopped walnuts or chocolate chips (I say the more chocolate, the better, but if you use walnuts, pretend it’s healthy, okay?)
Step-by-Step with Stories
Step 1: Preheat the Oven
Preheat your oven to 175°C (350°F).
That’s right, let’s get things cooking! You’ll know it’s ready when the radiant heat makes the kitchen feel like home. Oh, and don’t forget to line your muffin tin with papers or give each cup a quick spritz of non-stick spray. Trust me, you’ll thank yourself when it’s time to get those muffins out.
Step 2: Mash the Bananas
In a large bowl, mash the bananas until smooth.
Now, I’m telling you this because I made the mistake of leaving chunks once, and let’s just say, banana surprise is not something the family appreciated. Casey still looks sideways at muffins after that one. You want a nice, gooey mixture that smells sweet enough to distract you from the laundry pile you’re ignoring.
Step 3: Add the Melted Butter
Stir in the melted butter.
Oh, this is where the magic starts! You’ll want to get in there and mix it well, so it doesn’t sit there looking like an amateur cooking class. I once got impatient here and dumped everything in at once. Disaster. Keep it slow and steady, and you’ll get a lovely emulsified batter.
Step 4: Mix in Sugar, Egg, and Vanilla
Next, mix in the sugar, beaten egg, and vanilla extract.
Now, this is important: I used to skip the vanilla because I thought it’d save money. I was wrong, very wrong. The smell of that warm, sweet aroma baking away? Absolute bliss. And don’t you dare skimp on the sugar—this isn’t a diet muffin; it’s a treat!
Step 5: Add the Baking Soda and Salt
Sprinkle in the baking soda and salt.
This little bit of science is what helps them rise. I can’t count how many times I forgot this step (which is why we’re talking about it, am I right?). My muffins were flatter than my hopes of gym motivation. Pay attention here!
Step 6: Stir in the Flour
Gently fold in the flour until just combined.
You don’t want to overmix—think of this like a dance. If you’re too forceful, your muffins will come out tough instead of fluffy. I get a little too excited sometimes and then I’m regretting it later when we’ve all got muffin bricks.
Step 7: Add Optional Ingredients
Now, if you’re feeling adventurous, toss in the walnuts or chocolate chips.
Here’s the thing: I like a bit of a surprise in my muffins, which is why I usually opt for chocolate most days. But on occasion—like when I feel like pretending I’m healthy—I toss in walnuts. Nobody gets hurt and I can still enjoy a bit of indulgence.
Step 8: Scoop and Bake
Spoon the mixture into your lined muffin tin.
I usually fill each cup about three-quarters full. There’s a method to my madness—overfilling can lead to a volcano effect. Yep. Not ideal. Then, slide that beauty into the oven and set your timer for about 18-20 minutes.
You’ll know they’re done when the tops are golden brown and a toothpick inserted into the centre comes out clean. Try not to inhale the aroma before they cool. It’s hard, I know.
Step 9: Cool Down Time
Once baked, take them out and let them cool for a few minutes in the tin before transferring to a wire rack.
This is the hardest part (seriously, it tests my patience). I usually hover nearby, still stealing bits of that warm muffin, hoping they’ll magically last an hour rather than the ten minutes they actually do.
Troubleshooting Real Life
-
If you burn the bottom:
Don’t panic! Just carefully slice the bottom off with a serrated knife and carry on like nothing happened. They’ll still taste good, promise. -
If you’re out of flour:
You can use oats in a pinch. Just whizz them up to a flour-like consistency. Who doesn’t love a little improvisation? -
If you need to pause:
Put the muffin tin back in the turned-off oven while dealing with whatever life throws your way. -
If it’s just not working:
You know what? That’s life sometimes. Just take a breath and accept that it’s okay to call for takeout once in a while!
The Serving Story
I serve these beauties in big, chunky bowls because it feels more festive, like I’m treating myself to a bit of bakery luxury. When I’m not stacking them precariously on top of each other, I like to make them a wee bit posh with a dollop of mascarpone cheese and a drizzle of honey. It’s like I’m giving myself permission to indulge a little.
Leftovers? Ha! What are those? Seriously, if there are any left, which is a huge if, they taste even better the next day, and they can be easily popped in the microwave for a quick snack or breakfast.
When I Make This
I usually whip these up on Sunday mornings because there’s something cozy about the lazy weekend vibes and the smell wafting through the house. While they’re baking, I usually find myself attempting to declutter the heaps of laundry pile. Multitasking at its finest, right?
We eat these muffins around the coffee table while bickering about what to watch next, usually with cartoons for the kids or a classic film for me. And guess what? Clean-up always takes a while because I’m definitely snagging those few extra crumbs left in the bowl.
The Conversational Close
These banana muffins have been through a lot with me. They’ve seen me through sleepless nights, school projects, and the occasional “burning dinner” panic. I know they’re not gourmet or Instagram-perfect, but they’re mine. So, if you’re emanating that sweet smell of banana yumminess in your kitchen, I hope they bring you as much joy as they bring me.
I’d love to hear if you try this recipe—drop me a note or give me a wave on social media! And seriously, what’s your go-to comfort food? Mine constantly changes, but today? It’s absolutely these banana muffins.
Banana Muffins
Ingredients
Method
- Preheat your oven to 175°C (350°F). Line your muffin tin with papers or grease with non-stick spray.
- In a large bowl, mash the bananas until smooth.
- Stir in the melted butter until well mixed.
- Mix in the sugar, beaten egg, and vanilla extract.
- Sprinkle in the baking soda and salt, and mix well.
- Gently fold in the flour until just combined.
- Add any optional ingredients like walnuts or chocolate chips.
- Spoon the mixture into the lined muffin tin, filling each cup about three-quarters full.
- Bake for 18-20 minutes, or until the tops are golden brown and a toothpick inserted in the center comes out clean.
- Let the muffins cool in the tin for a few minutes before transferring them to a wire rack.