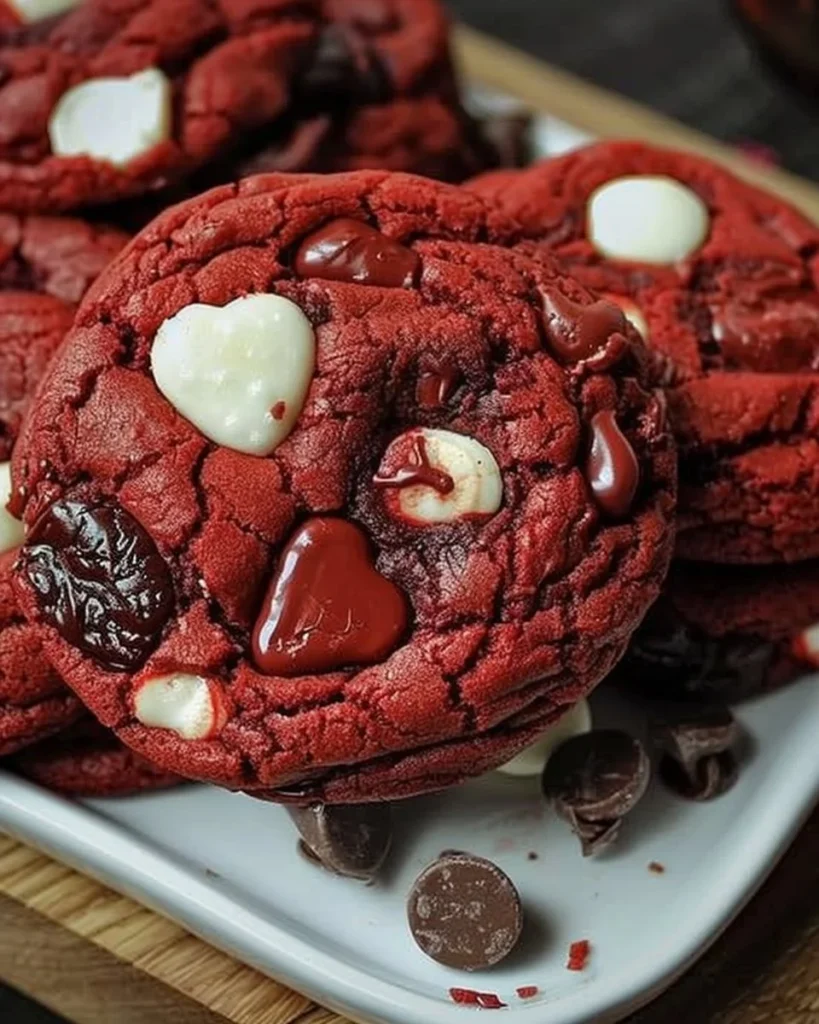
The Red Velvet Cookie That Saved a Family Gathering: A Personal Journey
The first time I tried to bake red velvet cookies, I was convinced I was channeling my inner baking goddess. This was supposed to be my pièce de résistance, a majestic treat that could impress my family and friends as they gathered for a festive weekend. Let me tell you, it went spectacularly wrong. Picture this: a kitchen covered in flour, chocolate shavings everywhere, and the sweet smell of burning sugar wafting through my home as I frantically tried to salvage what my husband, David, was calling “the most entertaining disaster of the day.” (His joke only made it worse—trust me on this.)
As I stood there, hands covered in an ambiguous red goo that looked like a crime scene, David casually strolled in, chuckling at my predicament. His words, “Well, my love, at least the cookies will have character!” rang in my ears long after they were uttered. It was humbling to say the least, but little did I know, that chaotic afternoon would lead me to discover this red velvet cookie recipe you need in your life. A family gathering where laughter meets sweet indulgence can be salvaged—just stick around, and I’ll let you in on my journey!
Why This Matters
So why should you care about red velvet cookies besides the glorious colour and delectable taste? Let me clue you in: these cookies have a way of transcending ordinary snacking. When the world feels heavy and everything else seems to have gone awry, making and sharing a batch of these cookies feels like a warm embrace. This is what to whip up when you want to take a moment to breathe, connect, and maybe just indulge all while putting a little love into something special.
Whether it’s for a holiday get-together, a spontaneous rainy day bake-off with your kids, or simply to impress the neighbour who “just dropped by,” these cookies are your answer. Spoiler alert: they also taste fabulous with a cup of strong Earl Grey—oh, the simple joys of life!
Before You Start
Now, before we get cracking (pun intended) on these beautiful cookies, let’s go over a few quick tips to make your baking experience seamless:
-
Off-brand cocoa works, too!—If you’ve only got that random cheap cocoa powder hidden in the back of the cupboard, embrace it! Just know that the flavour might not be as rich, but I won’t judge.
-
Prep that mixer first!—I always make sure my stand mixer is set up and ready to go. Trust me; you don’t want to start mixing, only to remember it’s somewhere under a pile of kitchen towels.
-
Baking is a science.—If your dough feels too runny, don’t panic! You can always add a touch more flour until you achieve the right consistency. Learning from my mistakes here, as I once ended up with a pancake-like cookie.
-
Put on your favourite tunes!—Bake with joy, my friend! Whether it’s an old-school pop anthem or classical pieces from my grandmother’s old records, something that lifts your spirit makes the whole process way more enjoyable.
Ingredients List with Personal Notes
Here’s what you need to whip up these beauties:
-
2 cups all-purpose flour (I usually buy the Tesco brand; it’s super affordable and reliable. If you have self-raising flour, that works too!)
-
½ cup unsweetened cocoa powder (Dark chocolate cocoa works like a dream for depth of flavour. Use what you have, really.)
-
1 tsp baking soda (This is your cookie’s magic raising agent. Don’t skimp out!)
-
1/2 tsp salt (I use sea salt because my grandma was adamant it brings out the sweetness. Hence, the pinch of nostalgia!)
-
1 cup unsalted butter, softened (Honestly, I always forget to take this out beforehand. A quick zap in the microwave for 10 seconds can help!)
-
1 cup granulated sugar (I’m not one for fancy sugars; this works perfectly fine.)
-
1 cup brown sugar (Adds a lovely moistness; it’s the secret nobody tells you!)
-
2 large eggs (Make sure they’re at room temperature; they blend better. I accidentally cracked a cold egg once—what a mess!)
-
1 tsp vanilla extract (Madagascar vanilla is lovely if you’re feeling fancy, but regular old extract works just brilliantly!)
-
1 cup buttermilk (If you’re out of buttermilk, a splash of vinegar or lemon juice in normal milk does the trick. Trust me—I’ve been there!)
-
Red food colouring (gel preferred) (Don’t go nuts with this! A little goes a long way for a striking effect.)
-
Cream cheese frosting for topping (Homemade, of course! Because who doesn’t love a good cream cheese frosting?)
Step-by-Step Instructions
Step 1: Preheat Your Oven
The Practical Instruction:
Preheat your oven to 350°F (175°C) and line two large baking sheets with parchment paper.
The Human Insight:
Starting with a hot oven helps those cookies rise properly.
Anecdote:
This is also my cue to set the mood with some music! The last time, I cranked up some Fleetwood Mac. Oh, the memories!
Step 2: You’ve Got to Sift
The Practical Instruction:
In a medium bowl, sift together the flour, cocoa powder, baking soda, and salt.
The Human Insight:
Sifting helps to aerate the flour and creates a light texture. You’ll know it’s done when you see a lovely fountain of cocoa!
Anecdote:
This is where my son Oliver makes an appearance, armed with a spatula and a cheeky grin, eager to ‘help’ while trying not to spill flour everywhere. It’s chaos, but lovely chaos.
Step 3: Cream the Butter and Sugars
The Practical Instruction:
In your stand mixer, cream together the softened butter, granulated sugar, and brown sugar until light and fluffy. This usually takes about 2-3 minutes.
The Human Insight:
Why this step matters: Creaming introduces air into the dough, giving your cookies that lovely lift.
My Personal Hack:
If you forget to soften the butter (oops!), cube it first for quicker melting.
Step 4: Adding the Eggs and Vanilla
The Practical Instruction:
Add eggs one at a time, mixing well after each addition, followed by the vanilla extract.
Common Mistake Here:
Don’t rush—mixing thoroughly ensures a smooth dough. I learned this the hard way when my cookies turned out lumpy once.
Anecdote:
Oliver always asks if he can crack the eggs—he’s convinced he’s a master chef after watching too many cooking shows. It’s a heartwarming sight, really.
Step 5: It’s Colour Time!
The Practical Instruction:
Now, it’s time to add the buttermilk, followed by red food colouring! Adjust the colour until you’re happy with the shade.
The Sensory Cue:
If you’re mixing right, you’ll see a lovely rich colour forming.
Anecdote:
During covfefe times (you know, pandemic baking), what started as plain flour became a vibrant symbol of creativity and joy in my home.
Step 6: Combine the Dry Ingredients
The Practical Instruction:
Gradually add the dry mixture to the wet ingredients, mixing on low speed until just combined. Don’t overmix, or you’ll have tough cookies.
My Personal Hack:
I use a spatula to scrape the bowl; it’s perfect for getting those last bits of flour incorporated without overworking the dough.
Step 7: Scoop and Bake
The Practical Instruction:
Using a tablespoon or cookie scoop, drop heaping tablespoons of dough onto your prepared baking sheets, spacing them about 2 inches apart.
The Human Insight:
They spread out—trust me.
Anecdote:
This is where I taste-test the dough. I mean, can you blame me? It’s practically mandatory.
Step 8: Bake
The Practical Instruction:
Bake the cookies for approximately 12-15 minutes, until the edges are firm but the centre is still soft.
Why This Step Matters:
You want them underbaked slightly for that chewy texture—nobody likes cookies that crumble!
Common Mistake:
If you leave them in too long, it’s game over. Learn from my mistakes!
Step 9: Cool and Frost
The Practical Instruction:
Let the cookies cool on a wire rack for about 10 minutes before frosting with your beloved cream cheese frosting.
Anecdote:
David insists that I make just a tad extra frosting to dip those cookies right in before I even serve them—ah, the little joys of married life!
Trouble-Shooting Real Life
-
If you burn the bottoms:
Don’t panic—try cutting off the burnt part! Okay, it’s not ideal, but these things happen. -
If you run out of buttermilk:
Mixing lemon juice or vinegar in regular milk works a treat—yep, it’s been a life-saver! -
If you need to pause:
Simply cover the dough and chill it in the fridge if life interrupts (I’m looking at you, toddler’s meltdown!). -
If it’s just not working:
Honestly, it may be time to order a pizza and call it a day. This is your baking journey, after all!
Serving Story
I love serving these cookies on my quirky floral china plates; they add a bit of whimsy to my kitchen! Sometimes, we go all out and grab the fancy coffee mugs for a giggle, as we settle in for movie night—the kids in their jammies and the adults with a glass of wine, of course.
But here’s the real secret: leftovers are simply divine, better the next day because they’ve had time to rest and the flavours deepen. They never last long in my house, so I rarely have any!
When I Make This
I usually make these red velvet cookies on Sunday afternoons after a chaotic week—because nothing says self-care like baking in comfy trousers and sipping tea! I often put on my apron, blast Fleetwood Mac, and get lost in the moment.
While they’re baking, I’ll often tidy up the house—or scroll through social media, you know, various levels of productivity. We usually devour these on the coffee table, sprawled on the couch, laughing over the chaotic week behind us.
Even better, clean-up takes no time. David helps with the dishwasher, and it’s a team effort. Plus, who doesn’t want to lick the spatula? (It’s practically a rite of passage!)
The Conversational Close
This red velvet cookie recipe has seen me through so many moments—the joy of new friendships, the sorrow of weary days when I needed some extra sweetness, and celebrations of small victories (and yes, even some of life’s messiest messes). It might not be perfect, but it’s mine, and that’s what makes it special.
So why not give this recipe a go? I’d love to hear how your cookies turn out. Tag me on social media, or just enjoy them quietly over a cup of tea. What’s your go-to comfort food? Mine changes, but right now, it’s these red velvet cookies that always bring a smile to my face!

Red Velvet Cookies
Ingredients
Method
- Preheat your oven to 350°F (175°C) and line two large baking sheets with parchment paper.
- In a medium bowl, sift together flour, cocoa powder, baking soda, and salt.
- In your stand mixer, cream together softened butter, granulated sugar, and brown sugar until light and fluffy (about 2-3 minutes).
- Add eggs one at a time, mixing well after each addition, followed by vanilla extract.
- Add buttermilk, followed by red food coloring. Adjust color to your liking.
- Gradually add the dry mixture to the wet ingredients, mixing on low speed until just combined.
- Using a tablespoon or cookie scoop, drop heaping tablespoons of dough onto prepared baking sheets, spacing them about 2 inches apart.
- Bake the cookies for approximately 12-15 minutes, until the edges are firm but the center is still soft.
- Let the cookies cool on a wire rack for about 10 minutes before frosting with cream cheese frosting.