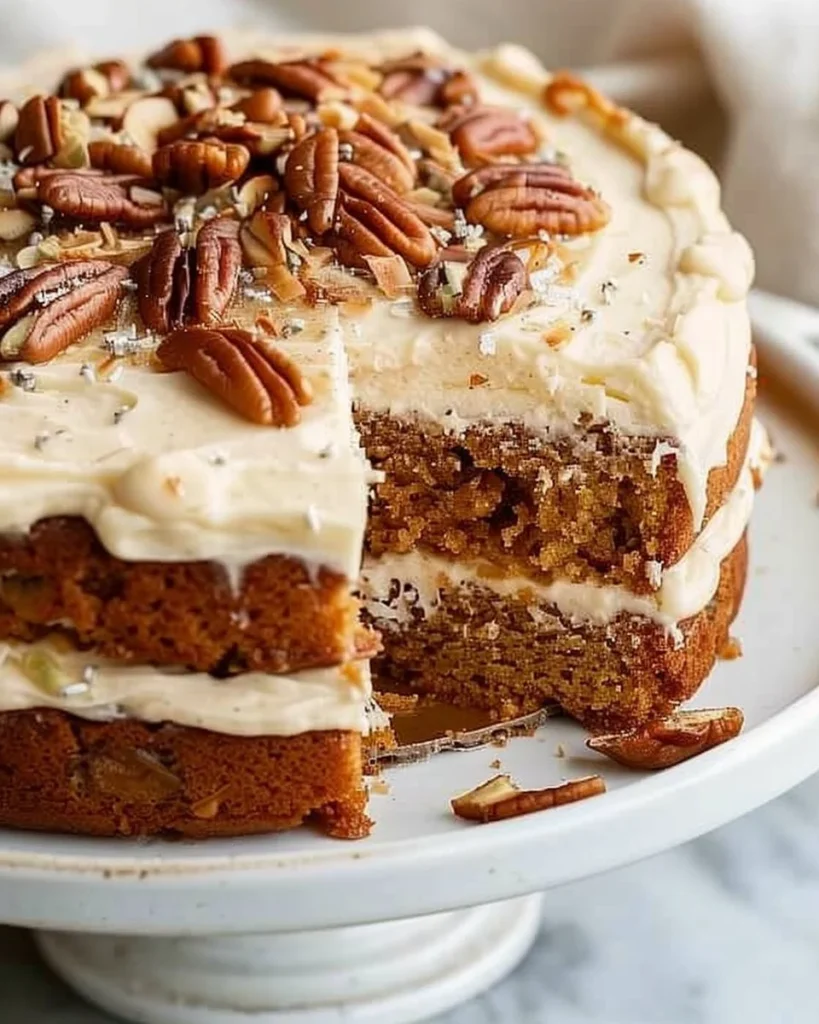
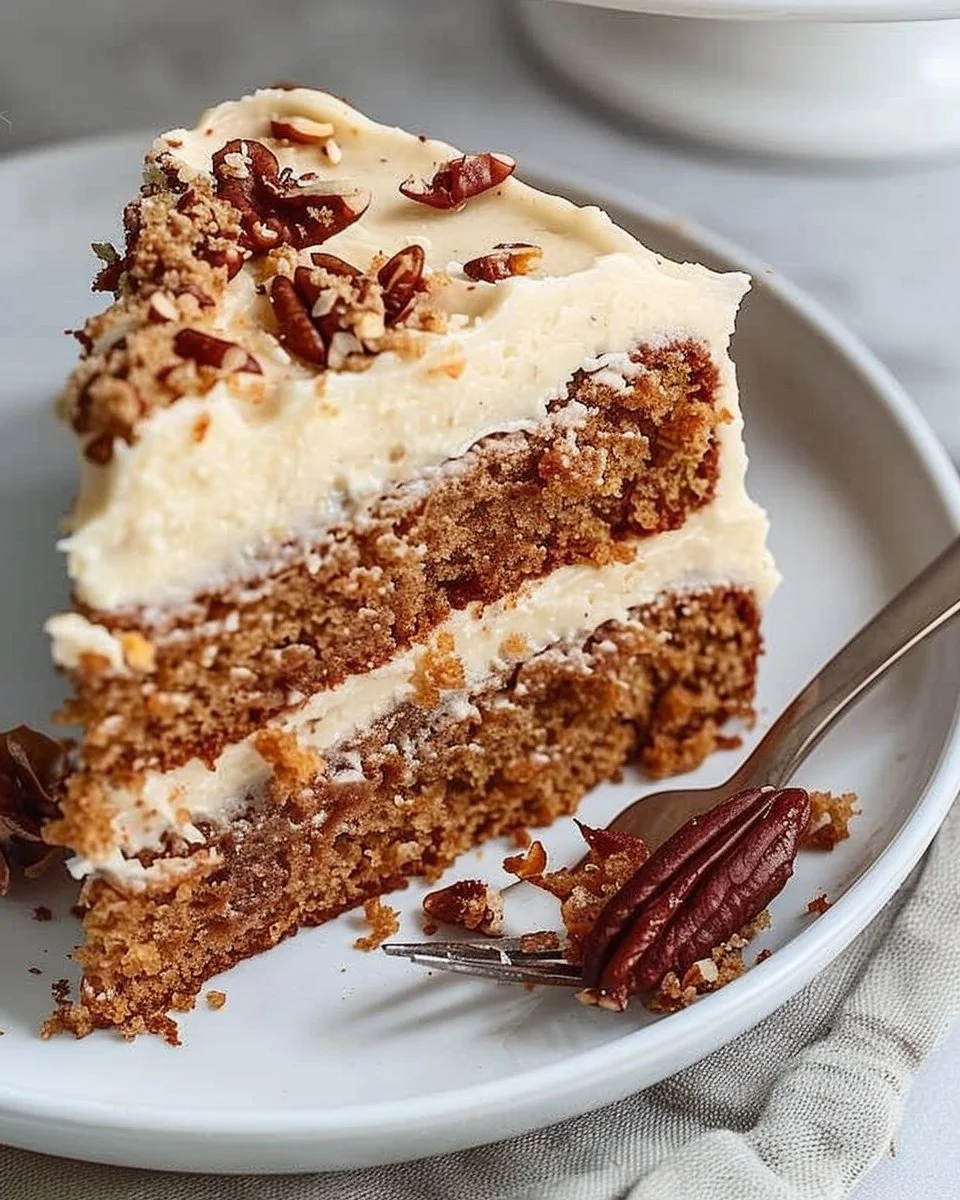
Easy Paleo Hummingbird Cake: A Slice of Joy from My Kitchen to Yours
The first time I attempted to make a hummingbird cake, I ended up with something that looked like a pile of sad cereal in a baking dish. I mean, it was a disaster. Imagine me in my tiny kitchen, flour on my face, banana peels scattered about (seriously, why were there so many?), and my youngest, Lily, asking, “Are we having cake or mashed banana tonight, Mum?” I remember laughing between sobs—because honestly, that’s how you cope, right? Your kitchen turning into Ground Zero for baking catastrophes? Anyway, my friend Sarah stopped by, took one look, and told me, “You’ve gotta try it again. Sometimes, things just need a second chance.”
Well, fast forward a bunch of years, and I’ve got a delicious Easy Paleo Hummingbird Cake recipe that I’m telling you, is perfect for when you’ve had a long week, you’re too tired to think, and you just want something that feels like a warm hug, minus all the sugar and gluten. Let me save you from the hot mess I made and show you how to whip this up without losing your sanity or your love for baking in the process.
Why This Matters
This isn’t just any cake—this is the cake that says “I’m here for you” when life is throwing curveballs. Trust me on this; it’s what you bring to a friend who’s had a tough day, or maybe what you whip up when you just need a little pick-me-up. It’s indulgent, it’s nostalgic, and best of all, it’s paleo, so it feels a bit less like cheating on your diet and more like giving yourself some much-deserved love. I mean, who doesn’t deserve a slice of cake that makes you feel good inside?
Before You Start
- If you don’t have almond flour, don’t panic—use whatever nut flour is in your pantry. I’ve made this with cashew flour before, and it turned out just fine.
- A good food processor makes a world of difference. If you don’t think you’ve got one, double-check your cupboards. The one I use is a trusty old Cuisinart that’s seen better days but still gets the job done.
- I’ve had my toddler "help" before, which ended up being flinging a handful of coconut flakes everywhere. Just be prepared for a mini clean-up if you bring the kids into it.
- Okay, and here’s where I get real—pour yourself a glass of wine or brew some tea before you dive into this. You’ll thank me later.
Ingredients List with Personal Notes
- 2 cups almond flour (Don’t skip the finer stuff; I tried once with the coarser stuff and it was not pretty.)
- 1 tsp baking soda (Don’t go thinking that’s a fluffy suggestion—I tried omitting it and let’s just say… no.)
- 1 tsp cinnamon (I joke it’s basic, but cinnamon brings a warmth that’s just dreamy. I almost put it in my morning coffee too.)
- 1/4 tsp salt (Sea salt, because my grandma swore by it, and it adds a little punch.)
- 1/4 cup coconut oil, melted (Try to get the organic stuff if you can; it really does make a difference in flavour.)
- 1/2 cup honey or maple syrup (I usually use honey, but if you’re feeling fancy, use maple syrup. It’s worth it.)
- 3 ripe bananas, mashed (You’ll know they’re ripe when they start getting those black spots. If they’re too green, well, save them for your husband’s smoothies.)
- 2 eggs (Trust me when I say you want room temperature eggs. I don’t always plan that far ahead, but it really does matter!)
- 1 cup crushed pineapple, drained (The sweeter, the better. Don’t skip this part because it’s like a tropical vacation in each bite.)
- 1/2 cup chopped walnuts (Optional, but my son insists they’re the best part. I mean, I wouldn’t know—I eat the cake straight out of the pan.)
- 1/2 cup unsweetened shredded coconut (This makes it feel like you’re indulging, even when you’re not, you know?)
Step-by-Step Instructions
Step 1: Preheat the Oven
-
Preheat your oven to 350°F (175°C).
This step might seem simple, but it’s crucial. You want your oven nice and hot before the batter goes in. You’ll know you’ve done it right when the kitchen starts to warm up a bit and you get that lovely smell of coconut oil. Ah, the anticipation!
Step 2: Mix the Dry Ingredients
-
In a large bowl, combine almond flour, baking soda, cinnamon, and salt. Mix it well with a whisk.
So here’s the thing: if you don’t whisk the dry ingredients properly, you’ll end up with little lumps of baking soda in your cake. And then you’ll have to deal with the whole “did you put salt or sugar in there?” conversation later. Trust me, nobody wants that drama.
Even my eight-year-old has learned to stand back when I do this step because the last time, I sent a cloud of flour into the air that looked like I had a ghost in the kitchen.
Step 3: Combine Wet Ingredients
-
In another bowl, mix the melted coconut oil, honey, mashed bananas, and eggs. Stir until well combined.
I think this is where I start getting a little too excited and dump everything in at once. I mean, you have to stir it, why not make it a little messier? The secret nobody tells you is that if you crush your bananas and then throw them into the bowl with the oil while it’s still warm, it gets mysteriously creamy and wonderful.
-
Fold in the crushed pineapple.
Okay, your kitchen’s going to smell so good right now. It’s like a tropical party. If you’ve got a toddler near, prepare to share a few spoonfuls because they’ll inevitably pop up, declaring, “Mummy, can I have a taste?”
Step 4: Combine Wet and Dry
-
Pour the wet ingredients into the dry ingredients and mix until just combined.
At this point, I find it helpful to give my bowl a seriously good stir. Don’t go too far though! Over-mixing can lead to a dense cake, and we don’t want that.
Step 5: Add the Extras
-
Now for the grand finale, gently fold in the walnuts and shredded coconut.
This is where my heart starts to race. The walnuts add a lovely crunch, and the coconut? Oh, it’s like confetti in this cake. Sometimes I add a bit more just because I fancy it, and it’s my kitchen, right? Live a little!
Step 6: Bake It Up!
-
Pour the batter into a greased 8-inch round cake pan.
I usually stand there for a moment, just looking at the batter, trying to remember to take a photo before it gets devoured. Spoiler alert: I often forget until it’s been sliced and half of my family is covered in cake crumbs.
-
Bake for 25-30 minutes or until a toothpick comes out clean.
Use your timer wisely, folks. If you get distracted (hey, it happens to the best of us), you could end up with a cake that’s burnt at the edges but gooey in the middle. You’ll know it’s done when the smell wafts through your kitchen and you cannot resist any longer.
Step 7: Let It Cool
-
Allow the cake to cool in the pan for about 10 minutes before transferring it to a wire rack to cool completely.
Now here’s the good part—this is when you test your patience. Try to keep the kids (and yourself) from devouring it immediately. By now, your house smells like a bakery, and I’m not gonna lie, I often cave and have a little slice before it’s cool. Can we talk about how that first bite is pure bliss?
Troubleshooting Real Life
- If your cake burns on the edges but is raw inside, you’ve got a classic case of oven hot spots. Lower the temperature next time and give it more time.
- Out of walnuts? Pecans work just as well. Seriously, you can’t mess this cake up too badly.
- If it’s feeling too wet after the bake, maybe your bananas were extra large. Add a tad more almond flour next time and it should balance nicely.
- And if all else fails and it’s just a hot mess: order takeout and laugh it off. Life’s too short for cake stress!
The Serving Story
I usually serve this in my grandma’s old pie dish. I swear it’s got magic in it—everything tastes better from it for some reason. The perfect side? It doesn’t even need one! But if you’re into that sort of thing, a dollop of coconut whipped cream wouldn’t hurt.
Now, this is the part that will lift your spirits: leftovers taste even better the next day. Seriously, let it sit for a while before devouring. The flavours meld together, and you really get to appreciate every bite.
When I Make This
I tend to whip this up on lazy Saturday afternoons when the walls of my house feel a bit too close. While it bakes, I’ll usually throw in a load of laundry or—full disclosure—start scrolling through my phone while pretending to clean. And then we eat it straight off the coffee table while binging the latest series on Netflix. Sometimes you just need that comfort, right?
The clean-up usually takes longer than the baking surprisingly! But hey, it’s worth it because those smiles around the table make it all seem worth the crumbs on my kitchen floor.
The Conversational Close
This Easy Paleo Hummingbird Cake has been with me through many late nights and family gatherings. It’s become our go-to for celebrations and comfort. I’m not saying it’s perfect, but it’s mine, and that’s what counts. If you decide to give it a whirl, I’d love to hear your stories! Tag me in your pics or just enjoy it quietly with a cup of tea. And hey, what’s your go-to comfort food? Mine may change with the seasons, but right now? It’s this cake.
So, are you ready to bake? Let’s create some delicious chaos together.

Easy Paleo Hummingbird Cake
Ingredients
Method
- Preheat your oven to 350°F (175°C).
- In a large bowl, combine almond flour, baking soda, cinnamon, and salt. Mix well with a whisk.
- In another bowl, mix the melted coconut oil, honey, mashed bananas, and eggs until well combined.
- Fold in the crushed pineapple.
- Pour the wet ingredients into the dry ingredients and mix until just combined.
- Gently fold in the walnuts and shredded coconut.
- Pour the batter into a greased 8-inch round cake pan.
- Bake for 25-30 minutes or until a toothpick comes out clean.
- Allow the cake to cool in the pan for about 10 minutes before transferring it to a wire rack to cool completely.